Concrete saws are powerful tools used to cut through concrete, brick, asphalt, and other tough materials. Whether you are a professional contractor or a DIY enthusiast, it’s important to follow proper techniques and safety precautions when using a concrete saw. In this blog post, we will share some valuable tips for cutting with a concrete saw.
1. Wear appropriate protective gear
Before you start cutting with a concrete saw, make sure to wear the right protective gear. This includes safety goggles or a face shield to protect your eyes from flying debris, ear protection to avoid hearing damage, a dust mask or respirator to prevent dust inhalation, and sturdy gloves to protect your hands. Additionally, wear steel-toed boots to keep your feet safe from falling objects.
2. Choose the right blade
Selecting the right blade for your concrete saw is crucial for a successful cutting experience. The choice of blade depends on the type of material you are cutting and the project requirements. Diamond blades are commonly used for cutting through concrete and other tough materials. Ensure that the blade is compatible with your specific saw model and that it is in good condition before starting the job.
3. Prepare the work area
Before you begin cutting, it’s essential to prepare the work area to ensure maximum safety and efficiency. Clear away any obstacles or debris that may hinder your movements. Mark the cutting line using chalk or a marking tool to guide your saw. Finally, ensure that the surrounding area is clear of any bystanders or pets who may inadvertently come in harm’s way.
4. Master the cutting technique
To achieve precise and clean cuts, it’s crucial to master the right cutting technique. Begin by firmly gripping the saw with both hands, using a strong stance for stability. Keep a steady motion, slowly pushing the blade into the material at a consistent speed. Avoid forcing the saw as this may cause the blade to bind or break. Let the saw do the work by applying even pressure and maintaining a steady hand.
5. Keep the blade cool
Concrete cutting generates a lot of heat, causing the blade to wear out faster. To prevent premature blade failure, it’s essential to keep it cool during operation. Most concrete saws come equipped with a water supply system that sprays water onto the blade, reducing heat and dust. Ensure that the water supply is functioning properly and adjust the flow accordingly to keep the blade adequately cooled.
6. Manage dust and debris
Cutting with a concrete saw can produce significant amounts of dust and debris, posing health risks and hindering visibility. To mitigate these issues, use a wet-cutting method that incorporates water to control dust. Alternatively, use a dust extraction system or a vacuum attachment designed to capture airborne particles. Regularly clean the work area to minimize the accumulation of dust and debris.
7. Take breaks and stay hydrated
Concrete cutting can be physically demanding, especially for longer periods. Take regular breaks to rest and hydrate, especially if you are working in hot or humid conditions. Prolonged exposure to the noise and vibrations from the saw can also cause fatigue. Consider wearing vibration-dampening gloves or using anti-vibration handles to reduce discomfort.
8. Maintain your equipment
To ensure optimal performance and longevity of your concrete saw, regular maintenance is essential. Clean the saw after each use, removing any residual concrete or debris. Check the blade for wear and tear, and replace it if necessary. Inspect the belts, filters, and other components regularly and make necessary repairs or replacements. Following the manufacturer’s guidelines for maintenance will help keep your equipment in top condition.
Summary
Cutting with a concrete saw requires careful preparation, the right technique, and adherence to safety measures. By wearing the appropriate protective gear, choosing the correct blade, preparing the work area, and mastering the cutting technique, you can achieve clean and precise cuts. Remember to keep the blade cool, manage dust and debris, take breaks, and maintain your equipment for optimal performance. With these tips in mind, you can safely and efficiently cut through concrete and other tough materials.
Got Questions? Let Us Help!
Welcome to Ram Rent-All, Inc. If you are looking for quality equipment, look no further. We are your one-stop solution for all of your equipment rental needs. We have a huge selection of equipment to choose from, from lawn and garden tools to construction necessities. Options include air compressors, Bobcats, forklifts, generators, tractors, water pumps, mixers, light towers, pressure washers, and more! If you’re going to do a job yourself, you want the best tools, and we can supply them to you at a reasonable price, without the need for costly contractors or direct purchases. Call us today!
Whether you’re digging for an extension or a new deck, you can make your job more efficient and safer by learning a few smart tips. The most important tip is to call 811 before you dig so that utilities can mark the location of underground lines. This is a free and simple service that protects you, your family and your neighbors. Call a few days before you dig, and your utility company will send a locator to mark the approximate locations of underground pipes and cables.
Preparation
Digging is a great way to improve your garden soil, and it can be done all year round. However it is most useful in the autumn as this allows the frosts to break up the soil. Before digging a bed it is best to add a top dressing of compost, manure or organic matter. This will help to aerate the soil and improve it for root penetration. Adding organic matter to the soil before you dig will also increase the amount of nutrients that can be found in the soil. This will help your plants grow better and produce more fruit and flowers.
Equipment
Whether you’re digging for landscaping, construction or just digging around your home, you need the right equipment. This can make a big difference in the success of your project. A square shovel is a good tool for digging in hard-packed soil or moving dirt, gravel, mulch or sand. They have flat tips and squared sides that produce smooth trench walls. Trenchers are designed for digging trenches for laying pipes, drainage and cables. They can dig to greater depths and are suitable for all types of terrain. Drain spades have rounded tips and curved sides for scooping debris from a trench. They also work well for shaping the trench after excavation. Pick mattocks have a head with a pickaxe on one side and a chiselled blade on the other. They are excellent for breaking up rocky or hard surfaces and can chop roots. Pinch bars are long crowbars with a smaller blade that can be used for levering and prying. They are great for digging in soft or hard soil and can be used to break up rocks and concrete.
Safety Measures To Take
Trenching and excavations can be dangerous, especially when the job involves a deeper trench. Soil can be unstable, and workers need protective systems to prevent collapses or cave-ins that can cause serious injury or death. Protective systems include sloping, benching or shoring. These systems keep soil from falling into the trench, protecting workers from being crushed or buried by a collapsing wall. A cave-in is the most common reason for worker injuries and fatalities in excavation work, according to OSHA. The agency’s priority goal is to reduce these injuries and deaths by ensuring all workers are protected from collapse.
Reasons To Call 811
Regardless of the size of your project, call 811 a few days before digging to have underground pipes, wires and equipment located and marked. This keeps people safe and avoids damage to buried lines that provide gas, electricity, water and sewage, communications and other essential services. Every six minutes, a buried utility line is damaged because someone digs without calling 811. Hitting a buried line can disrupt critical service for you or your neighbors, cause expensive repairs, and result in costly fines. That’s why a free request to 811 is the first step in any digging project, no matter how small. That includes planting a flower bed, putting in a mailbox or installing a fence.
Excavating is a heavy duty job that requires the right equipment to get the job done. This is why a professional excavation company will invest in top-quality tools. Each tool can handle different types of digging tasks.
Spade
The spade is one of the most common tools used for excavating. It can be used to dig trenches and other deeper holes, as well as for edging lawns or lifting sod. In addition, the spade can be used to bury small weeds and mix in plant matter or compost. This can help soil to loosen and aerate, which in turn increases access for beneficial earth worms. The spade can also be used to divide plants that need it, such as trees that outgrow their space in your garden. This can be done by gently levering them away from the ground, without damaging their roots.
Shovel
A shovel is a simple tool that can be used to lift and dig soil. It can also be used to scoop and move large amounts of material, such as sand or gravel. Shovels are usually made from metal and feature a blade attached to a handle. The blade can be flat or pointed, depending on the type of soil being worked with. The handle of a shovel is usually connected to the blade by a screw or rivet. This can make it easier to replace the handle if it ever breaks down. A shovel may have a kickplate that allows you to put your foot on the upper edge of the blade and add pressure to dig deeper. This can be helpful if you’re working with heavy ground.
Pickaxe
When digging a trench it is important to have all of the appropriate tools on hand. Each tool is designed for a different purpose and works together to dig the trench. A shovel is used to shape the trench and scoop up loose dirt. A pickaxe can be used to soften the ground before you start digging, this is especially useful in cold weather when the top layer of soil is tougher to dig. The pointed side of a pickaxe is great for lodging under rocks or hard ground and prying them free, while the flat head is good for chopping through roots. A 60” bar is also handy for breaking up really hard dirt like caliche.
Mattock
A mattock is a tool that can be used to dig or break up soil. It combines an axe blade on one end with an adze (horizontal blade) on the other. It can be used on both hard and soft ground, as well as rocky terrain. It can be used for a variety of tasks, including digging trenches and cultivating soil in raised beds. To use a mattock, grasp the handle or shaft about halfway through the head and place the other hand at the base. Bend at the waist and flex your knees. You can then swing the mattock downward in an arc, making short chops under the weight of the tool. This helps save energy and reduces the risk of straining your back.
Machine Tools
When it comes to digging, there are a variety of tools available. These vary depending on the project and the materials that will be used. When digging in soft ground, a dragline is the best option. These machines have long booms, and a digging bucket is suspended on a cable that hangs from the top of the boom. They are a great choice for larger excavations such as port construction, pond and canal dredging, and pile driving. They can also be rented for small jobs that require only the use of heavy machinery. If you’re not sure which excavating equipment is right for your job, a professional provider will help you determine the best options.
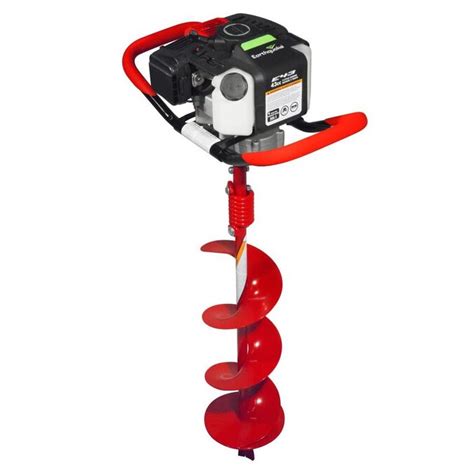
Doing yard work and other projects by yourself is commendable. However, some projects go much more smoothly with the assistance of a mechanical item. A power auger can come in handy if you need to dig holes to create room for a fence or another fixture in the yard.
You can find power augers at home improvement stores and online shops, which can be set up for one or more users. The following are some instructions on how to use a power auger to help you with your project:
Run It
It’s understandable if you need to learn how to start a power auger. The first step in the process is stabilizing the unit on the ground and setting the choke in the "RUN" position.
Pump It
Next, you’ll need to look for the primer bulb and pump that several times. You are done priming it when you see the fuel line.
Set the Choke
The manufacturer’s guide provides instructions on setting the choke, which might be different for every model. Thus, you’ll need to refer to your guide and set the choke the way it explains. Typically, you will put it to "FULL CHOKE" if the engine is cold and "HALF CHOKE" for a warm engine.
Turn It On
Now your auger needs a little power. Hence, you need to turn the ignition to the "ON" position to start.
Pull and Squeeze
The next step requires you to do two activities at once. Master this, and you’ll know how to start an auger appropriately.
You’ll need to pull the start cord while you squeeze the throttle. Ensure that you keep your feet away from the auger while trying to start it because it will be engaged and can cause bodily harm. Steer clear enough to avoid injuries when it starts.
Dig
Avoid squeezing the throttle too much at first. The goal should be to squeeze it just enough to pierce the ground. Let it get into the ground a few inches before applying additional pressure to the throttle. Once you do that, you and the other person can get into a digging groove.
Tips for Using an Auger Effectively
These are some tips to be mindful of as you use the power auger:
Don’t Work Too Hard
The machine is there to make your work easier. Thus, you don’t need to put a tremendous amount of power into operating it. Let its weight handle the load.
Remove Dirt Periodically
You should stop the machine every now and again and then pull it out to remove some of the dirt. This simple process will make the work a lot easier for you.
Remove Difficult Objects With Your Hands
Stop the machine if you come across any challenging objects like rocks. Pull them out of the way with your hands, and be careful when doing so.
Rake and Shovel Extra Dirt
Rake and shovel the extra dirt you pull out of the hole to avoid damaging your grass. Your yard will thank you for it.
Use the process and tips mentioned above to use your power auger effectively. Your tasks should be much more manageable that way.
No matter what your plumbing project may be, there are certain tools you’re going to need in order to get the job done. And while some of these tools can be purchased outright, others may require that you rent them from a plumbing tool rental company. Here’s a look at some of the essential plumbing tools for any project.
1. Pipe Wrench
A pipe wrench is a handy tool that can make any plumbing project much easier. This type of wrench has a long, adjustable jaw that can be used to grip pipes of various sizes. The jaws are also serrated, which helps to prevent the pipe from slipping. Pipe wrenches are typically made from durable materials such as cast iron or steel, making them ideal for use on tougher projects. Many pipe wrenches also have an offset handle, which helps to improve leverage and makes it easier to apply torque. Whether you’re tightening fittings or loosening stubborn pipes, a pipe wrench is a valuable asset for any plumber.
2. Plunger
A plunger is a simple yet essential tool for clearing clogs. The most common type of plunger is the bellows plunger, which has a folding accordion-style design. This type of plunger effectively creates a seal around the drain so that you can apply enough pressure to clear the clog. For tougher clogs, you may need to use a force cup plunger, which has a cup-like design that helps to create a tighter seal. Plungers are also great for clearing minor clogs in toilets and sinks. When using a plunger, be sure to use enough force to break up the clog without damaging your pipes.
3. Auger
An auger is a tool that’s specifically designed for clearing clogged drains. It consists of a long, flexible cable that’s equipped with a cutting head at one end. The cutting head is used to break up the clog so that it can be flushed away. Augers are available in both hand-held and power models. Insert the cable into your drain slowly and gently, rather than attempting to force it through, to avoid damaging your pipes.
4. Pipe Cutter
A pipe cutter is a handy tool that can be used to cut pipes of various sizes. This type of cutter typically has two handles that are connected by a blade. The blade is made from durable materials, such as carbon steel or stainless steel, and is sharpened on both sides. To use a pipe cutter, simply align the blade with the pipe and squeeze the handles together. The blade will cut through the pipe, making it easy to remove piping sections. Pipe cutters are a great choice for cutting copper pipes, as they provide a clean, precise cut.
5. Soldering Torch
A soldering torch is essential for any plumber working with copper pipes. This type of torch uses a flame to heat up the pipes so that they can be joined together. Soldering torches typically have a trigger-style ignition system, making them easy to use. When using a soldering torch, wear protective gloves and eyewear to avoid injury.
Bottomline
No matter what your plumbing project entails, having the right tools is essential for getting the job done properly. From pipe wrenches and plungers to augers and soldering torches, various tools can make your project easier. If you don’t have the right tools on hand, you may need to rent them from a plumbing tool rental company. At Ram Rent-All, Inc., we offer a wide selection of plumbing tools for rent, so you can get the job done right. Contact us today to learn more about our rental options.