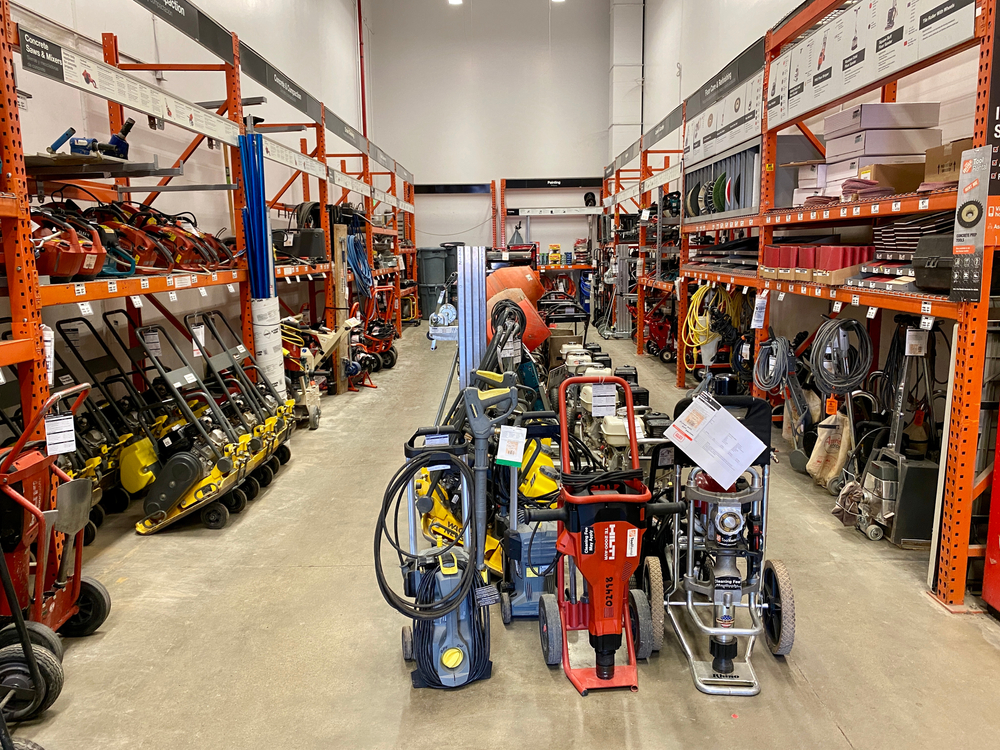
Renting heavy equipment tools is a practical and cost-effective solution for individuals and businesses in Monroe, LA, who need specialized machinery for short-term projects. Whether you are managing construction, landscaping, or agricultural tasks, having access to the right tools can make all the difference in the efficiency and outcome of your work. However, while equipment tool rentals can offer many advantages, there are also common pitfalls that renters often fall into. These mistakes can lead to delays, increased costs, and potentially even damage to the equipment or property. To ensure that your rental experience is smooth and beneficial, it’s crucial to avoid these common mistakes when renting heavy equipment tools in Monroe, LA.
Not Understanding Your Equipment Needs
One of the most common mistakes people make when renting heavy equipment is failing to fully understand their needs. Renting equipment tools without a clear understanding of the specific job requirements can lead to renting machinery that’s either too big or too small for the task. For example, if you’re renting a piece of machinery for a construction job, it’s important to consider not only the size and weight of the equipment but also its capabilities and how well it matches the specific demands of your project.
Taking the time to evaluate the scope of your project, the terrain, and the tasks at hand can help you make the right decision. Renting equipment that is too large can result in higher rental fees, fuel consumption, and possible difficulty in maneuvering. On the other hand, renting equipment that is too small could cause inefficiencies and may even delay the completion of your project. If you are uncertain about the right choice of equipment, it’s always a good idea to consult with the rental company. Equipment rentals in Monroe, LA, often include experts who can guide you in selecting the most suitable machinery for your specific job.
Overlooking the Maintenance History of the Equipment
Another critical mistake to avoid when renting heavy equipment is not checking the maintenance history of the tools. When you’re renting heavy machinery, you are not just paying for the use of the equipment but also for its reliability and functionality. If the equipment has been poorly maintained, you could be setting yourself up for breakdowns, delays, and even safety risks.
Before signing a rental agreement, inquire about the equipment’s maintenance history and whether it has been regularly serviced. Rental companies that take good care of their fleet will usually keep detailed records of maintenance and repairs, ensuring that the machinery is in optimal working condition. Additionally, ask the rental company about any warranties or guarantees that come with the equipment. This is particularly important for heavy equipment rentals, where the potential for breakdowns is higher due to the intense demands placed on the machinery.
Ignoring Safety Protocols and Training Requirements
Safety should always be a top priority when working with heavy equipment, and it’s essential to avoid neglecting safety protocols. Each piece of machinery has its own set of safety guidelines that operators must follow. Failing to adhere to these protocols can result in accidents, injuries, or costly damage to the equipment. Rental companies typically provide safety information and operator manuals, but it’s important to ensure that you and your team are adequately trained on how to operate the equipment safely.
In Monroe, LA, where construction and other heavy-duty activities are common, you should never assume that you or your employees know how to operate unfamiliar machinery. If you’re unsure about how to safely use a piece of equipment, ask the rental company if they offer any training or if they can provide recommendations for certified trainers. Some rental companies even offer training services as part of the rental package, which can be incredibly beneficial in preventing accidents and ensuring that the equipment is used properly.
Not Accounting for Additional Costs
While renting heavy equipment can seem like an affordable option compared to purchasing new machinery, many renters overlook additional costs that can accumulate over the rental period. These costs can include things like delivery and pickup fees, insurance, fuel, and even damage waivers. Failing to factor in these extra expenses can quickly cause your rental budget to exceed your expectations.
Before finalizing your rental agreement, it’s essential to clarify all potential additional costs with the rental company. Ask for a detailed breakdown of the charges to ensure that you are fully aware of the total cost. This will help you avoid surprises later on and allow you to budget more effectively. Additionally, inquire about the insurance policies available for the equipment. In some cases, the rental company will provide basic coverage, but it may not be enough to cover all potential damages, especially for high-value or specialty machinery.
Not Checking Rental Terms and Conditions
Another common mistake renters make is failing to read and understand the terms and conditions of the rental agreement. Rental contracts can be complex, and many people overlook crucial details like rental duration, late fees, or restrictions on how the equipment can be used. Ignoring the fine print can lead to unnecessary complications and unexpected costs.
Before signing a rental agreement for equipment rentals in Monroe, LA, take the time to thoroughly read the contract. Pay close attention to the rental period and any stipulations regarding late returns or penalties. Some rental companies may charge extra fees for early returns or additional usage hours, so understanding the fine details is essential. Additionally, make sure to review the company’s policies regarding maintenance, damage, and repairs. Knowing your responsibilities and the rental company’s expectations will help you avoid any legal or financial issues down the road.
In Monroe, LA, many rental companies offer flexible rental agreements, but you need to be clear about the terms before committing. Be sure to ask questions if there’s anything in the contract that you don’t understand. It’s always better to address any uncertainties upfront rather than risk costly mistakes later.
Conclusion
Renting heavy equipment tools in Monroe, LA, can be an excellent choice for completing construction, landscaping, and other projects without the large upfront cost of purchasing machinery. However, to ensure that your rental experience is positive, it’s essential to avoid the common mistakes outlined above. Take the time to assess your needs, check the equipment’s maintenance history, prioritize safety, account for additional costs, and carefully read the rental terms and conditions. By avoiding these mistakes, you can maximize the benefits of equipment tool rentals and ensure that your projects are completed on time, within budget, and without unnecessary complications. Whether you’re renting for a short-term job or a longer-term project, proper planning and understanding can make all the difference in achieving success.
Need an Equipment Rental Company in Monroe, LA?
Welcome to Ram Rent-All, Inc. If you are looking for quality equipment, look no further. We are your one-stop solution for all of your equipment rental needs. We have a huge selection of equipment to choose from, from lawn and garden tools to construction necessities. Options include air compressors, Bobcats, forklifts, generators, tractors, water pumps, mixers, light towers, pressure washers, and more! If you’re going to do a job yourself, you want the best tools, and we can supply them to you at a reasonable price, without the need for costly contractors or direct purchases. Call us today!
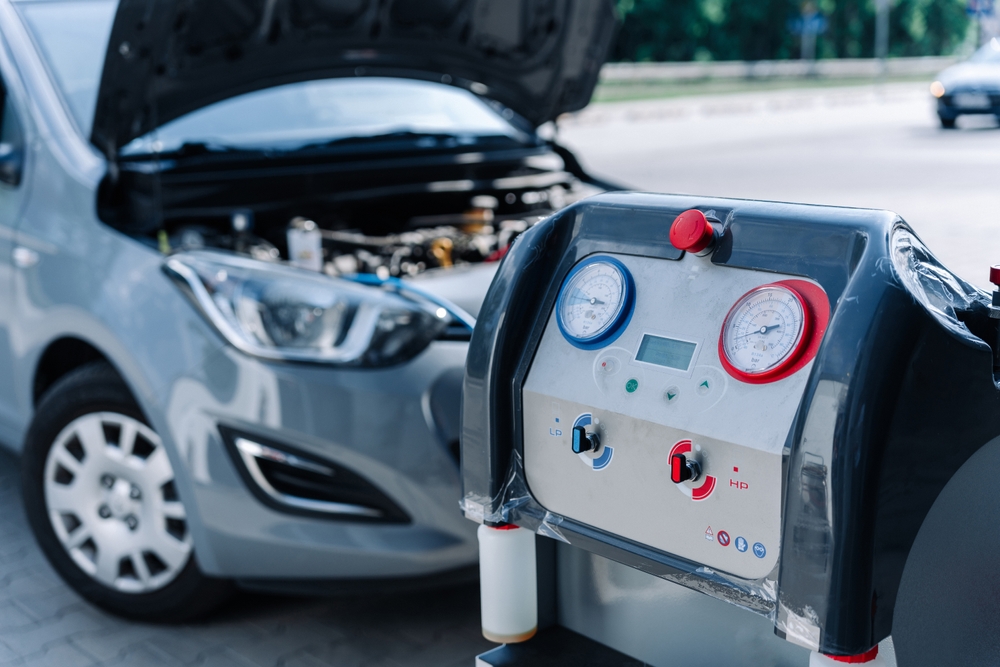
Mechanics in Monroe, LA, face unique challenges when it comes to equipping their garages with the right tools and heavy equipment. From routine car repairs to more specialized tasks, having access to the right tools can make all the difference in both the quality of service provided and the efficiency of work. However, purchasing heavy equipment and tools outright can be a significant financial investment for any shop owner, particularly when it comes to equipment that is only needed for specific tasks or occasionally. Luckily, there are solutions available that can help mechanics in Monroe, LA get their hands on premium equipment at a fraction of the cost: heavy equipment and tool rentals.
Renting heavy equipment and specialized tools offers a way for mechanics to access top-tier machines and tools without the long-term financial commitment. Whether you need air compressors for efficient power supply or transmission jacks for lifting heavy parts, renting equipment can streamline the repair process, ensure you can handle a variety of jobs, and help your business stay financially flexible. This blog will explore the benefits of renting essential tools and equipment for mechanics, focusing on specific needs in Monroe, LA.
Why Renting Equipment Makes Sense for Mechanics in Monroe, LA
The decision to rent heavy equipment or tools may seem like a simple one for mechanics, but many underestimate the financial and operational benefits of doing so. One of the main advantages of renting is the cost savings. For small to medium-sized garages or individual mechanics who operate on a tight budget, purchasing high-end tools such as air compressors or transmission jacks can be an expensive upfront investment. However, by opting for equipment rentals in Monroe, LA, mechanics can significantly reduce their capital expenditure and pay only for the time they need to use the equipment. This is especially helpful for businesses that only need certain equipment sporadically.
Renting tools also allows mechanics to access state-of-the-art machines that they may not be able to afford if purchasing outright. Premium tools often come with the latest technology, ensuring that repairs are completed more efficiently and with greater precision. By renting equipment, mechanics can stay ahead of industry standards and deliver a higher quality of work without having to constantly reinvest in new technology.
Furthermore, renting allows for greater flexibility. It is not uncommon for mechanics to work on a variety of vehicle types, each requiring different tools and equipment. Rather than maintaining a vast inventory of rarely used machines, renting allows mechanics to select the exact equipment they need for each job. This minimizes clutter, saves space, and enables mechanics to focus on what truly matters—delivering top-quality repairs to their customers.
The Role of Air Compressors in Auto Repair
Air compressors are essential tools in any mechanic’s arsenal, as they are used to power a range of pneumatic tools such as impact wrenches, air ratchets, and spray guns. Whether you’re working on a car’s suspension system or performing routine tire changes, an air compressor can significantly speed up the process and improve efficiency. In Monroe, LA, air compressors are particularly useful for dealing with the region’s frequent maintenance needs on vehicles that endure wear and tear from both city and rural driving conditions.
For mechanics who don’t need an air compressor every day, renting is an ideal solution. Instead of purchasing an expensive unit that might only be used occasionally, you can rent a high-performance air compressor as needed. This is especially important for small repair shops or individual mechanics who may only need to use this equipment for certain jobs like engine repairs or tire service. Renting means you’ll have access to a high-quality air compressor when you need it, without the overhead costs associated with purchasing one outright.
In addition, air compressors require regular maintenance to keep them operating at their best. When you rent from a reputable provider, you don’t have to worry about the upkeep. The rental company will ensure that the equipment is properly maintained, sparing you time and effort while ensuring that the tools you use are always in optimal condition.
Transmission Jacks: Essential for Heavy Lifting
Another indispensable piece of equipment for mechanics in Monroe, LA, is the transmission jack. These specialized jacks are designed for lifting and supporting heavy vehicle components like transmissions and engines during repairs. Given the weight and complexity of these parts, transmission jacks are crucial for ensuring the safety of mechanics and the successful completion of repairs.
Unlike standard jacks, transmission jacks are designed with a specific focus on balance, stability, and maneuverability, allowing mechanics to lift and position heavy transmissions with ease. However, these jacks are not used on a daily basis by most mechanics, which makes them a perfect candidate for rental rather than purchase. Renting a transmission jack for the duration of the job means that mechanics can access the equipment they need without paying for something they won’t use frequently.
Additionally, transmission jacks are large and require significant storage space in a garage or shop. For smaller shops, maintaining the space to store such a tool can be a challenge. Renting this equipment alleviates the need for storage while ensuring the mechanic has access to a high-quality jack when it’s required. Renting also gives the flexibility of trying different models of transmission jacks based on the size and type of the vehicle being worked on, making the repair process smoother.
The Convenience of Tool Rentals for Specialized Jobs
In any mechanic’s workshop, certain jobs require highly specialized tools that might only be needed for specific repairs. This can include items such as diagnostic machines, engine hoists, brake lathes, and even welders. Purchasing these tools outright can be cost-prohibitive, especially if the demand for them is not constant. Renting tools for specialized tasks is a great way for mechanics to take on a wider variety of jobs without committing to expensive equipment that will only see occasional use.
For example, a mechanic in Monroe, LA, may specialize in engine work but occasionally need to tackle tasks like body repair or custom modifications. For these types of jobs, they might need equipment like welders or cutting tools, which would not otherwise be part of their standard toolkit. Renting these tools ensures that the mechanic can take on these specialized tasks and provide comprehensive services without the burden of purchasing tools they don’t regularly use.
Tool rentals also help mitigate the risk of equipment becoming outdated. In the fast-paced world of automotive technology, tools and machines evolve rapidly. Renting allows mechanics to always have access to the latest versions of the tools they need, which can help them stay competitive in the marketplace. It also provides a cost-effective way to test new equipment and decide whether it’s worth purchasing down the line.
The Flexibility and Support of Equipment Rental Services in Monroe, LA
In Monroe, LA, there are several rental companies offering a wide range of heavy equipment and tools for mechanics. These companies understand the specific needs of local repair shops and are well-equipped to support mechanics in achieving their business goals. Not only can mechanics rent the equipment they need, but they can also benefit from expert guidance and maintenance support, ensuring that the equipment functions optimally throughout the rental period.
Renting from a local equipment rental company also provides the convenience of timely delivery and pickup, ensuring that tools and machinery are available exactly when needed. This eliminates downtime and helps mechanics stay on schedule with their work. Additionally, rental companies often offer flexible rental terms, allowing mechanics to choose hourly, daily, or long-term rental options based on the scope of their projects.
The customer service provided by rental companies is another key advantage. If a piece of equipment malfunctions or doesn’t perform as expected, many rental companies offer prompt replacement or repair services, ensuring that mechanics can continue working without interruption. This level of support is invaluable, especially when tackling demanding jobs that require precision and specialized equipment.
Conclusion
Renting heavy equipment and tools is a smart business decision for mechanics in Monroe, LA, offering access to high-quality machines and tools without the steep initial investment. Whether you need air compressors for power tools, transmission jacks for lifting heavy components, or specialized tools for specific jobs, rental services provide the flexibility, cost savings, and convenience that can help mechanics deliver exceptional service to their customers. By leveraging equipment rentals, mechanics in Monroe can stay ahead of the competition and focus on what they do best—keeping their customers’ vehicles in excellent condition.
Need an Equipment Rental Company in Monroe, LA?
Welcome to Ram Rent-All, Inc. If you are looking for quality equipment, look no further. We are your one-stop solution for all of your equipment rental needs. We have a huge selection of equipment to choose from, from lawn and garden tools to construction necessities. Options include air compressors, Bobcats, forklifts, generators, tractors, water pumps, mixers, light towers, pressure washers, and more! If you’re going to do a job yourself, you want the best tools, and we can supply them to you at a reasonable price, without the need for costly contractors or direct purchases. Call us today!
When tackling automotive repairs, having the right tools can make all the difference. However, purchasing specialized equipment for occasional use may not always be cost-effective. This is where automotive equipment rentals come in. Whether you’re a seasoned mechanic or a DIY enthusiast, renting essential tools ensures that you have access to the equipment you need without breaking the bank. Below is a comprehensive guide to the essential automotive equipment rentals that can make your job easier and more efficient.
Benefits of Renting Automotive Equipment
Before diving into the list of must-have rental tools, it’s essential to understand why renting is a smart option.
Cost-Effectiveness: Purchasing high-quality equipment like engine hoists or air compressors can be costly. Renting allows you to save money while still having access to premium tools.
Space-Saving: Large equipment can take up significant space in your garage. Renting tools only when needed helps save storage space.
Maintenance-Free: Rental companies maintain their equipment, so you don’t need to worry about upkeep.
Try Before You Buy: Renting allows you to test different brands and models to see which works best for your needs before committing to a purchase.
Now that we’ve covered the benefits, let’s look at the essential equipment you should consider renting.
Air Compressor Rentals: A Versatile Must-Have
One of the most versatile pieces of equipment you can rent is an air compressor. Air compressors power a wide range of pneumatic tools, making them indispensable for many automotive tasks.
Common Uses for Air Compressors
Tire Inflation: Maintaining the correct tire pressure is crucial for safety and fuel efficiency.
Pneumatic Tools: Air-powered impact wrenches, ratchets, and grinders make tasks like loosening stubborn bolts much easier.
Paint Spraying: For bodywork and touch-ups, an air compressor powers paint sprayers for an even, professional finish.
Choosing the Right Air Compressor Rental
When renting an air compressor, consider the following factors:
CFM (Cubic Feet per Minute): Higher CFM is needed for tools that require more air.
Tank Size: A larger tank can handle more extensive jobs without frequent refilling.
Portability: If you need to move around frequently, consider a portable air compressor.
Air compressor rentals can be game-changers, whether you’re painting your vehicle or using air-powered tools.
Engine Hoists: Lifting Power Made Easy
Engine hoists, also known as cherry pickers, are essential when it comes to removing or installing an engine. This task can be labor-intensive and risky without the right equipment.
Why Rent an Engine Hoist?
Heavy-Duty Lifting: Engine hoists are designed to lift and support the significant weight of an engine.
Safety: Attempting to remove an engine without proper lifting equipment can lead to injuries and vehicle damage.
One-Time or Infrequent Use: Since removing an engine isn’t a frequent task for most DIYers, renting an engine hoist makes more sense than purchasing one.
Types of Engine Hoists Available for Rent
Hydraulic Engine Hoists: These are the most common and use hydraulic power to lift heavy loads.
Foldable Hoists: Ideal for those working in smaller garages, foldable hoists save space when not in use.
Electric Hoists: These are more efficient and require less manual effort, making them great for larger, more complex jobs.
Before renting, ensure that the engine hoist you select can handle the weight of your vehicle’s engine.
Transmission Jacks: Precision for Transmission Work
Transmission jacks are essential for safely removing, installing, and aligning transmissions. Given the complexity and precision required for transmission-related jobs, having the right jack is crucial.
Why You Need a Transmission Jack
Stability and Safety: Transmission jacks are designed to securely hold and maneuver transmissions, which can weigh hundreds of pounds.
Precision Adjustment: The jack’s controls allow for fine-tuned positioning during installation or removal.
Efficiency: A transmission jack significantly reduces the time and effort required for transmission work.
Types of Transmission Jacks
Low-Profile Jacks: These are ideal for use with vehicles that have low ground clearance.
Telescopic Jacks: These have a higher lifting range and are commonly used for trucks and SUVs.
Air-Assisted Jacks: Some transmission jacks feature pneumatic assistance for smoother and more controlled lifting.
When choosing a transmission jack rental, ensure it has the appropriate weight capacity and height range for your vehicle.
Additional Essential Automotive Equipment Rentals
In addition to air compressors, engine hoists, and transmission jacks, there are several other tools worth considering.
Impact Wrenches
An impact wrench is invaluable for quickly loosening and tightening bolts, especially lug nuts.
Engine Stands
After removing the engine with a hoist, an engine stand allows you to rotate and work on the engine safely.
Brake Bleeders
Brake bleeding kits help remove air from brake lines, ensuring responsive braking performance.
Diagnostic Scanners
Modern vehicles have complex computer systems. A diagnostic scanner reads error codes and helps pinpoint issues.
Tips for Renting Automotive Equipment
Plan Ahead: Before renting, make a list of the tools you need and check their availability.
Understand the Rental Terms: Pay attention to the rental period, late fees, and any damage policies.
Inspect the Equipment: Before taking the equipment home, inspect it for any signs of wear or damage to avoid unexpected issues.
Ask for Assistance: If you’re unsure how to use a particular piece of equipment, ask the rental provider for a quick demonstration.
Cost Considerations for Equipment Rentals
The cost of renting automotive tools varies based on factors such as duration, type of equipment, and the provider. Below is a rough breakdown of average rental costs:
Air Compressor Rentals: $30 to $100 per day, depending on size and power.
Engine Hoists: $40 to $150 per day, depending on capacity and type.
Transmission Jacks: $50 to $120 per day, depending on design and features.
Many rental providers also offer discounted rates for longer rental periods, so it’s worth inquiring if you need the equipment for an extended job.
Conclusion
Renting automotive equipment like air compressor rentals, engine hoists, and transmission jacks can make your repair projects more efficient and less stressful. Instead of investing in expensive tools that may only be used a few times, rentals offer a flexible and cost-effective solution. By understanding your needs and choosing the right equipment, you can take on even the most challenging automotive tasks with confidence. Whether you’re swapping an engine, replacing a transmission, or performing routine maintenance, the right rental tools will help you get the job done safely and effectively.
Need an Equipment Rental Company in Monroe, LA?
Welcome to Ram Rent-All, Inc. If you are looking for quality equipment, look no further. We are your one-stop solution for all of your equipment rental needs. We have a huge selection of equipment to choose from, from lawn and garden tools to construction necessities. Options include air compressors, Bobcats, forklifts, generators, tractors, water pumps, mixers, light towers, pressure washers, and more! If you’re going to do a job yourself, you want the best tools, and we can supply them to you at a reasonable price, without the need for costly contractors or direct purchases. Call us today!
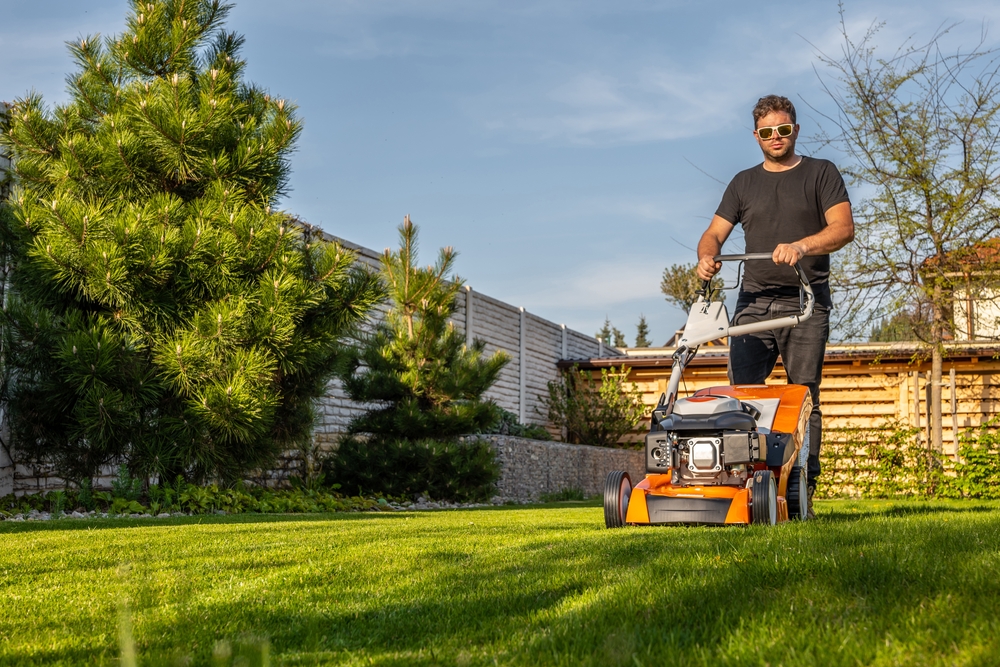
When winter rolls around, many homeowners shift their focus from vibrant summer lawns and gardens to ensuring their outdoor spaces are protected and well-prepared for the colder months. However, winter care doesn’t always mean buying costly equipment outright. Lawn equipment rentals provide an affordable and convenient way to access the tools needed for seasonal maintenance. Whether you’re handling a large property or a small garden, renting the right tools can make winter prep a breeze.
Benefits of Lawn Equipment Rentals for Winter Preparation
Winter can be harsh on your lawn and garden, and having the right tools ensures your yard remains in optimal shape. But instead of purchasing expensive machines, consider these advantages of renting:
Cost Savings: Lawn mower rentals and garden tiller rentals are much more affordable than purchasing equipment outright.
Avoiding Storage Issues: Large equipment like lawnmowers and tillers take up significant storage space, which can be problematic during winter months.
Access to High-Quality Equipment: Renting allows you to use premium equipment without the high upfront cost.
Maintenance-Free: Rental tools are often maintained by the rental company, saving you from the hassle of repairs.
Essential Tools for Winter Garden and Lawn Maintenance
Winter care for your lawn and garden involves several key tasks such as soil preparation, debris removal, and seasonal mowing. Below is a breakdown of the essential equipment you should consider renting and how each tool contributes to effective winter preparation.
Lawn Mower Rentals for Final Pre-Winter Mows
One of the most critical tasks before winter sets in is to give your lawn a final mow. Grass that is too long can become matted under snow, increasing the risk of fungal diseases. However, using the wrong type of mower can damage your lawn or leave uneven patches.
Push Lawn Mowers: Ideal for small to medium-sized yards.
Riding Mowers: Perfect for large properties or if you want to save time and effort.
Electric vs. Gas Mowers: Electric mowers are quieter and eco-friendly, while gas-powered mowers handle thick or wet grass more efficiently.
Lawn mower rentals offer flexible options for homeowners who need a specific type of mower for their lawn’s size and condition.
Garden Tiller Rental for Soil Preparation
Winter soil preparation is essential for healthy spring growth. A garden tiller rental can save you from hours of back-breaking manual labor. Tilling helps loosen compacted soil, incorporate compost or fertilizer, and remove dead plants and roots from your garden beds.
Front-Tine Tillers: Suitable for lighter tilling tasks and small garden beds.
Rear-Tine Tillers: Designed for heavy-duty soil work, especially in larger gardens or areas with hard-packed soil.
Electric vs. Gas Tillers: Electric tillers are lighter and easier to handle, while gas-powered options provide more power for tough jobs.
Tilling in late fall or early winter helps improve soil structure, ensuring your garden is primed for spring planting.
Leaf Blowers and Mulchers for Debris Removal
Clearing your yard of leaves, twigs, and other debris before winter is crucial. Leaving organic debris on your lawn can lead to excessive moisture buildup and mold. Instead of spending hours with a rake, consider renting a leaf blower or mulcher.
Handheld Leaf Blowers: Ideal for small properties and quick cleanups.
Backpack Leaf Blowers: Suitable for larger areas and heavy-duty leaf removal.
Mulchers: Turn leaves into nutrient-rich mulch that can be spread over garden beds to insulate plants during the winter.
Leaf blowers and mulchers provide efficiency and help recycle garden debris into useful material.
Aerators for Improving Lawn Drainage
Winter often brings excess moisture in the form of rain, snow, and ice. To prevent water from pooling on your lawn, aeration is key. Renting a lawn aerator can help you create small holes in the soil, improving drainage and allowing roots to access essential nutrients.
Manual Aerators: Cost-effective and ideal for small patches of compacted soil.
Core Aerators: Remove plugs of soil for deep aeration in large areas.
Spike Aerators: Create holes without removing soil, useful for minor aeration tasks.
Aerating in late fall ensures that your lawn is prepared to absorb water without becoming waterlogged.
Hedge Trimmers and Pruners for Plant Maintenance
Winter pruning helps prevent broken branches and encourages healthy regrowth in spring. If you have hedges, shrubs, or trees in your yard, renting hedge trimmers and pruners can make the job easier.
Electric Hedge Trimmers: Lightweight and ideal for trimming smaller hedges.
Gas-Powered Trimmers: Provide more power for larger or overgrown hedges.
Pruning Shears: Handheld tools perfect for precise cuts on smaller branches.
Pruning before winter can also reduce the spread of disease and improve the overall appearance of your yard.
Tips for Choosing the Right Rental Equipment
Selecting the right tools for your winter garden and lawn care involves more than just availability. Consider these factors when choosing your lawn equipment rentals:
Size of Your Property: Larger yards may require more powerful equipment.
Frequency of Use: If you only need the tool for a one-time task, a basic model may suffice. For repeated use, opt for more durable models.
Experience Level: Choose user-friendly equipment if you’re unfamiliar with using certain tools.
Weather Conditions: Consider whether you need equipment that can handle wet or icy conditions.
Where to Find Reliable Lawn Equipment Rentals
Finding a trustworthy rental service ensures you get well-maintained, high-performing equipment. Here’s what to look for:
Reputation: Read reviews and ask for recommendations.
Inventory: Choose a rental service that offers a wide selection of equipment.
Support: Ensure the rental company provides guidance on equipment use and safety.
Rental Policies: Check for clear policies on rental duration, late returns, and damage coverage.
Many local hardware stores and garden centers offer lawn mower rentals and garden tiller rentals, making it easy to get the tools you need for your winter prep.
Safety Tips for Using Rented Lawn and Garden Equipment
Safety should always be a priority when using lawn and garden equipment. Follow these guidelines to avoid accidents and ensure smooth operation:
Wear Protective Gear: Use gloves, safety goggles, and sturdy footwear.
Read the User Manual: Familiarize yourself with the equipment’s operation and safety features.
Check Equipment Condition: Inspect for any visible damage or loose parts before use.
Avoid Overexertion: Take breaks and stay hydrated, especially when using heavy-duty equipment.
By following safety precautions, you can complete your winter lawn and garden maintenance tasks efficiently and safely.
Conclusion
Winter garden and lawn care doesn’t have to be a daunting task. With the help of lawn equipment rentals, you can access the right tools without the financial burden of purchasing expensive machines. From lawn mower rentals for a final pre-winter trim to garden tiller rentals for soil preparation, renting essential tools ensures your outdoor space remains healthy and well-maintained. Whether you’re aerating your lawn, pruning hedges, or clearing leaves, renting equipment can help you achieve professional results at a fraction of the cost. Embrace the convenience of rentals and keep your yard in top shape, ready to thrive come spring.
Need an Equipment Rental Company in Monroe, LA?
Welcome to Ram Rent-All, Inc. If you are looking for quality equipment, look no further. We are your one-stop solution for all of your equipment rental needs. We have a huge selection of equipment to choose from, from lawn and garden tools to construction necessities. Options include air compressors, Bobcats, forklifts, generators, tractors, water pumps, mixers, light towers, pressure washers, and more! If you’re going to do a job yourself, you want the best tools, and we can supply them to you at a reasonable price, without the need for costly contractors or direct purchases. Call us today!
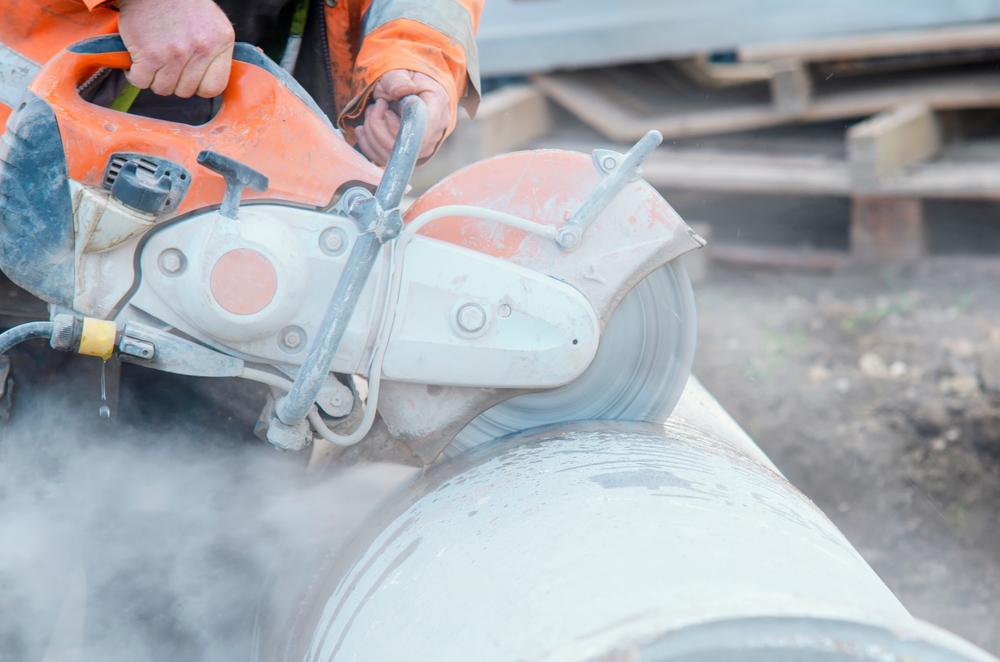
Concrete cutting is a crucial step in many construction, remodeling, and repair projects. Whether you’re breaking through an old driveway, creating expansion joints, or cutting decorative patterns, choosing the right concrete saw is essential. With so many options available, finding the best concrete saw for your project can feel overwhelming. This guide will simplify the process and provide a clear understanding of how to choose the right tool for your needs.
Understanding Concrete Saws: What Are They and Why Are They Important?
Concrete saws are specialized power tools designed to cut through concrete, masonry, asphalt, and other tough materials. They come in various sizes and styles, each suited for specific tasks. Selecting the appropriate saw not only ensures precision but also enhances safety and efficiency.
Types of Concrete Saws
Before diving into the decision-making process, it’s important to understand the main types of concrete saws available:
Handheld Concrete Saws: Lightweight and portable, ideal for small-scale projects and precision cuts.
Walk-Behind Saws: Larger and more powerful, best for cutting large areas like driveways, roads, or flooring.
Wall Saws: Used for vertical surfaces, such as cutting walls for windows or door openings.
Wire Saws: Designed for heavy-duty tasks, such as cutting large concrete blocks or structures.
Knowing the scope of your project will help narrow down your options.
Key Considerations for Choosing the Best Concrete Saw for Your Project
Several factors determine which concrete saw is right for your project. Here are the most critical aspects to consider:
1. Type of Project
Assessing the nature of your project is the first step in choosing the best concrete saw for your project. Ask yourself these questions:
Are you working on a small DIY project or a large commercial construction site?
Is the cut for decorative purposes, or do you need to break through thick concrete?
Will you be cutting horizontal or vertical surfaces?
For example, if you need to make precise cuts in a residential space, a handheld concrete saw may suffice. For extensive roadwork, a walk-behind saw would be more appropriate.
2. Material Type
Concrete isn’t always just concrete. The composition can vary widely and might include aggregates like sand, gravel, or even steel reinforcements. Additionally, asphalt and masonry often require similar tools but may need different blade types. Match the saw’s capabilities to the material you’ll be cutting.
3. Power Source
Concrete saws are available with different power options:
Electric Saws: Lightweight, quiet, and easy to use but limited by cord length or battery life.
Gas-Powered Saws: Powerful and portable, suitable for outdoor use but require ventilation.
Hydraulic or Pneumatic Saws: Typically used in professional settings, offering immense power but requiring specific setups.
Consider where and how the saw will be used to choose the most practical power source.
4. Cutting Depth
Different concrete saws offer varying cutting depths. A small handheld saw might cut up to 6 inches deep, while industrial walk-behind saws can cut significantly deeper. Knowing the thickness of the material will help you select a saw with the appropriate cutting capacity.
5. Blade Type
The blade you choose is just as important as the saw itself. Common blade types include:
Diamond Blades: Durable and effective for cutting through tough materials like concrete and asphalt.
Abrasive Blades: Economical but wear out faster, best for light-duty projects.
Choose a blade compatible with your saw and suited to the material you’ll be cutting.
6. Ease of Use and Portability
For DIY enthusiasts, ease of use and portability are key factors. Heavy or complicated saws may be challenging to operate, especially for beginners. Look for user-friendly models with ergonomic handles and straightforward controls.
7. Budget and Rental Options
Concrete saws can range from a few hundred to several thousand dollars. If you don’t plan to use the saw frequently, renting might be a better option. Understanding concrete saw rental guide options can help you find the right tool without overspending.
Concrete Saw Rental Guide: What You Need to Know
If purchasing a concrete saw isn’t practical for your project, renting is an excellent alternative. Here are some tips for navigating the concrete saw rental guide:
1. Determine Your Needs
Before renting, clearly define your project requirements. Knowing the cutting depth, material type, and duration of use will help rental companies recommend the best tool.
2. Inspect the Equipment
Always inspect rental equipment for wear and tear. Ensure the saw is in good working condition and that the blades are suitable for your project.
3. Ask About Accessories
Rental companies often provide additional accessories, such as blades, water tanks, or safety equipment. Inquire about these options to ensure you have everything you need.
4. Understand Rental Terms
Familiarize yourself with rental terms, including:
Duration of rental
Deposit requirements
Fees for damages or late returns
5. Seek Professional Advice
Don’t hesitate to ask rental staff for advice on operating the saw and ensuring safety during use. Many companies offer tutorials or written instructions to help you get started.
Tips for Safe and Effective Concrete Saw Use
Regardless of the type of saw you choose, safety and efficiency are paramount. Here are some tips to follow:
1. Wear Protective Gear
Always wear appropriate safety gear, including:
Safety goggles
Ear protection
Dust masks or respirators
Heavy-duty gloves
2. Use Water for Dust Suppression
Concrete cutting generates a significant amount of dust, which can pose health risks and obscure visibility. Many saws feature water attachments to suppress dust. Use this feature whenever possible.
3. Check the Blade Regularly
Inspect the blade for wear or damage before and during use. Using a worn-out blade can compromise cutting precision and safety.
4. Secure the Material
Ensure the material being cut is stable and secure to prevent accidents.
5. Follow Manufacturer Instructions
Always follow the manufacturer’s instructions for operating the saw. Each model may have specific guidelines that are crucial for safe use.
Popular Brands and Models to Consider
Here are some popular concrete saw brands and models to explore:
Husqvarna: Known for durable and reliable saws for both professional and DIY use.
Makita: Offers lightweight and user-friendly models ideal for smaller projects.
Stihl: Produces high-performance gas-powered saws for heavy-duty tasks.
DeWalt: Known for versatile, high-quality tools, including electric concrete saws.
Researching these brands can help you find the best concrete saw for your project.
Conclusion
Choosing the right concrete saw doesn’t have to be daunting. By considering your project’s specific needs, understanding the types of saws and blades available, and evaluating rental options, you can confidently select the best tool for the job. Whether you’re a professional contractor or a DIY enthusiast, this guide will help ensure your project’s success while keeping safety and efficiency at the forefront.
Need an Equipment Rental Company in Monroe, LA?
Welcome to Ram Rent-All, Inc. If you are looking for quality equipment, look no further. We are your one-stop solution for all of your equipment rental needs. We have a huge selection of equipment to choose from, from lawn and garden tools to construction necessities. Options include air compressors, Bobcats, forklifts, generators, tractors, water pumps, mixers, light towers, pressure washers, and more! If you’re going to do a job yourself, you want the best tools, and we can supply them to you at a reasonable price, without the need for costly contractors or direct purchases. Call us today!