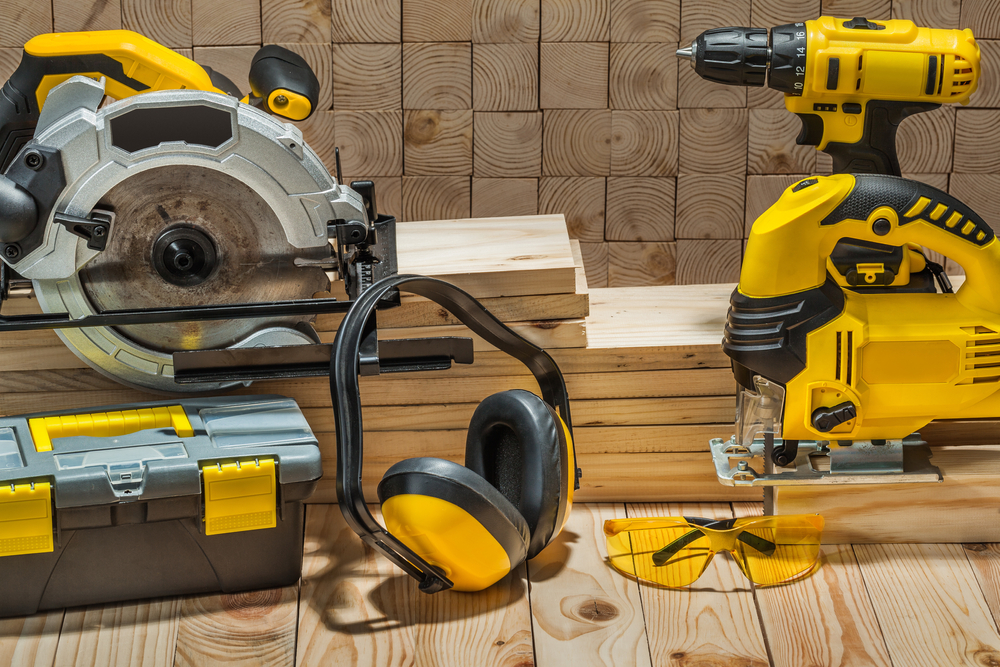
Weekends offer the perfect opportunity to dive into DIY projects that have long been sitting on your to-do list. Whether you’re a seasoned home improvement enthusiast or a first-timer inspired by online tutorials, having the right tools is essential. Fortunately, equipment rental in Monroe, LA makes it easy and affordable to access professional-grade tools and machinery without the long-term investment. From construction to landscaping, there’s no limit to what you can accomplish over a couple of days with the right preparation and equipment.
Transform Your Outdoor Space with Landscaping Equipment Rental in Monroe, LA
One of the most satisfying weekend projects you can undertake is revamping your outdoor space. From trimming overgrown shrubs to leveling uneven terrain, landscaping tasks are made easier with specialized equipment. Landscaping equipment rental in Monroe, LA gives you access to tools like brush cutters, stump grinders, lawn aerators, and tillers—tools that would be expensive to own but are essential for serious yard work.
Imagine transforming a weed-ridden backyard into a peaceful garden oasis or prepping your lawn for reseeding before fall. Whether you’re building flower beds or installing a new irrigation system, rented trenchers and augers can significantly reduce the manual labor required. In just a weekend, you can elevate your curb appeal and create an outdoor environment you’re proud of, all with the help of the right tool rental in Monroe.
Build a Deck or Fence Using Rent Construction Tools in Monroe
For homeowners seeking long-lasting value and utility, building a deck or fence is a weekend project that offers both. While this might seem like a task reserved for professional contractors, with a bit of planning and the proper equipment rental, Monroe, LA residents can handle it confidently.
Power saws, post hole diggers, augers, and nail guns are essential for this kind of project, and you can rent them for a fraction of the cost of purchasing. Compact loaders and wheelbarrows also come in handy when transporting lumber and gravel across your property. With these tools in hand, constructing a solid fence or a relaxing backyard deck becomes an achievable goal. The satisfaction of lounging on a deck you built yourself or securing your backyard with a well-constructed fence is hard to beat.
Clean Like a Pro with Pressure Washers and Other Weekend Equipment Rental in Monroe, LA
Sometimes, the most impactful DIY projects are those that clean and refresh your existing spaces. Renting a high-powered pressure washer for the weekend can make driveways, patios, and siding look brand new. Unlike store-bought electric washers, professional-grade gas pressure washers available through weekend equipment rental in Monroe, LA offer higher PSI levels and more consistent water flow, making tough grime and mildew vanish with ease.
This type of cleaning not only improves the aesthetics of your property but can also extend the lifespan of surfaces by removing harmful buildup. Pressure washers can also be used to prep surfaces for painting or sealing, giving you a head start on future projects. Add in other helpful tools like surface cleaners, ladders, or even wet/dry vacuums, and you’ve got a cleaning arsenal that gets the job done fast and efficiently.
Tackle Emergency or Planned Electrical Projects with Generator Rental in Monroe
Whether you’re working in a remote part of your property or need backup power during home upgrades, a generator rental in Monroe is a smart move. For DIYers handling tasks like rewiring a shed, installing outdoor lighting, or even managing temporary outages during electrical work, a rented generator provides dependable power wherever and whenever it’s needed.
Portable generators come in a range of sizes and output capacities, and choosing the right one ensures you can power tools, lights, and other devices without interruption. Monroe, LA’s rental centers often have experts on hand who can help you choose a unit that meets your specific needs. With a rented generator, your DIY plans won’t be halted by a lack of available outlets or unforeseen electrical problems.
Upgrade Your Home’s Curb Appeal with Compact Tool Rental in Monroe
Revitalizing your home’s exterior can be incredibly rewarding—and simpler than you might think. Tool rental in Monroe enables you to access compact, specialized tools like concrete mixers, walk-behind edgers, paint sprayers, and tile saws. These tools are indispensable when upgrading your porch, walkways, or entryway.
A fresh coat of paint on the front steps, new concrete pavers, or even the addition of custom-built planters can transform your front yard into a showcase. Monroe’s equipment rental options allow you to experiment with various tools without committing to a purchase. Because these improvements are focused and contained, most can be wrapped up in just two days, yet they dramatically enhance your home’s visual impact.
Digging and Trenching Made Easy with Trenchers and Augers
If your weekend plans involve any type of underground work—whether it’s installing drainage systems, laying electrical cables, or planting trees—trenchers and augers are game changers. Trenching manually can take hours and place unnecessary strain on your body, but renting specialized trenchers in Monroe means cleaner cuts, quicker completion times, and fewer aches and pains.
Augers, especially gas-powered models, make digging post holes for fences or decks faster and more accurate. These machines allow for uniform depth and spacing, which is essential for both functionality and aesthetics. Equipment rental services in Monroe, LA often carry a variety of trenchers and augers suited for different soil types and job sizes, ensuring you have the right tool for the task.
Save Time and Money by Planning Smart with Weekend Equipment Rental in Monroe, LA
Strategic planning is the key to making the most out of your weekend DIY efforts. Rather than spreading your projects over multiple weekends, Monroe residents can consolidate tasks by utilizing weekend equipment rental options. Many local rental centers offer flexible pick-up and drop-off schedules, package deals, and expert advice—all designed to help you succeed.
Start by creating a clear list of what you want to accomplish and what tools you’ll need. Next, contact a Monroe-based equipment rental provider to check availability and secure your rentals ahead of time. This ensures you don’t lose precious hours waiting for tools or making last-minute substitutions. With everything ready to go, your weekend becomes a focused and productive stretch of improvement, creativity, and satisfaction.
Whether you’re restoring, building, digging, or beautifying, having access to professional-grade tools can make all the difference. Monroe’s extensive tool and equipment rental offerings allow weekend warriors to turn their visions into reality—efficiently, affordably, and safely. Take the initiative, plan wisely, and let your next weekend in Monroe, LA be one filled with accomplishment and pride.
Need an Equipment Rental Company in Monroe, LA?
Welcome to Ram Rent-All, Inc. If you are looking for quality equipment, look no further. We are your one-stop solution for all of your equipment rental needs. We have a huge selection of equipment to choose from, from lawn and garden tools to construction necessities. Options include air compressors, Bobcats, forklifts, generators, tractors, water pumps, mixers, light towers, pressure washers, and more! If you’re going to do a job yourself, you want the best tools, and we can supply them to you at a reasonable price, without the need for costly contractors or direct purchases. Call us today!
Whether you’re a homeowner planning to tackle your backyard jungle or a DIYer ready to pour concrete for a new patio, your weekend projects just got easier thanks to the growing availability of equipment rental in Monroe, LA. Why invest in expensive tools that collect dust most of the year when you can rent exactly what you need for a fraction of the cost? From landscaping overhauls to small construction tasks, the right rental can mean the difference between a chore and a triumph. Let’s dig into the world of weekend equipment rental, Monroe, LA style.
The Convenience and Cost-Effectiveness of Equipment Rental
One of the major reasons residents and contractors in Monroe, LA are turning to equipment rental is the sheer convenience. When you rent, you’re not responsible for maintenance, storage, or the initial capital expense of purchasing. This is particularly appealing for people tackling short-term weekend jobs that require heavy-duty tools or machinery that aren’t typically found in the average garage.
For instance, if you’re resurfacing a driveway, you don’t need to own a concrete mixer or compactor. With options to rent construction tools in Monroe for just a day or two, you can get the job done without the burden of ownership. Most rental centers offer flexible hourly, daily, or weekend rates, making it simple to plan projects around your schedule and budget.
Moreover, rental outlets often keep their equipment in excellent condition to avoid downtime, ensuring you’re using safe and reliable tools every time. Whether it’s a trencher for digging irrigation lines or a skid steer loader for moving dirt, you’ll find modern, well-maintained machines ready to help you work efficiently and safely.
Transforming Your Yard with Landscaping Equipment Rental
Homeowners in Monroe, LA who are interested in revamping their outdoor spaces will find a wide variety of landscaping equipment rental options to simplify their tasks. These tools can turn labor-intensive jobs into manageable weekend accomplishments. From taming overgrown lawns to installing a garden walkway or retaining wall, there’s a machine for just about everything.
For example, dethatchers and aerators are perfect for prepping your lawn for seasonal growth. If you need to level your yard or remove debris, a bobcat or compact track loader can save you hours of back-breaking labor. Need to prune tall trees? Pole saws and stump grinders are available for rent and can help give your yard a professional finish without paying for landscaping services.
In Monroe, LA, equipment rental services often carry an extensive inventory tailored to local needs, including pressure washers for cleaning siding and patio pavers, post-hole diggers for fence installations, and mini-excavators for digging drainage trenches. With these tools at your disposal for the weekend, even large-scale landscaping projects become achievable goals.
Tackling Construction Projects Without the Investment
Got a weekend construction job in mind? Don’t let the lack of tools hold you back. You can easily rent construction tools in Monroe that are perfect for everything from simple repairs to more involved builds. Whether you’re framing a shed, laying concrete, or installing tile floors, there’s a rental solution available.
Circular saws, hammer drills, nail guns, tile cutters, and demolition hammers can all be rented, which means your toolbox can expand instantly for the duration of your project. For projects that require even more firepower, equipment like cement mixers, walk-behind saws, and drywall lifts are available at affordable rates.
Some rental outlets in Monroe also offer safety gear as part of their packages—helmets, eye protection, gloves, and more—helping to ensure you’re well-prepared for whatever task lies ahead. This makes renting an especially smart choice for occasional or first-time DIYers who may not own the gear needed for safe operation.
For larger undertakings, trailer rentals are also an option. Hauling lumber, gravel, or debris becomes a non-issue when you can add a utility trailer to your weekend lineup. The flexibility to scale up or down your tools according to your project is what makes tool rental in Monroe so attractive to amateur builders and homeowners alike.
Power Up With a Generator Rental in Monroe
One often overlooked but essential aspect of many outdoor or remote projects is electricity. Maybe you’re working in a backyard that’s far from a power outlet, or perhaps you’re hosting a special outdoor event that needs lighting and sound equipment. In these cases, a generator rental in Monroe is the perfect solution.
Portable generators can support your electric saws, drills, and lighting for nighttime work or emergency repairs. Monroe’s rental providers carry models of various wattages, allowing you to match the generator’s output to your power needs. Some units are compact and quiet—ideal for neighborhood use or small projects—while larger, more robust generators can handle an entire job site.
Storm preparedness is another reason to consider generator rental in Monroe. If you’re anticipating power outages due to severe weather, renting a generator for the weekend can provide peace of mind and keep essential appliances running. This can be particularly critical during Louisiana’s stormy seasons when unexpected outages are more common.
For RV users and campers, a weekend rental can offer the power to run air conditioners, cooking appliances, and entertainment systems. Whatever your application, the ability to rent on a short-term basis gives you the flexibility and reliability to keep things running smoothly.
Planning Your Weekend with Confidence
Before embarking on your next weekend project, it’s a smart idea to visit your local equipment rental provider in Monroe, LA to get expert advice on the best tools for your needs. Many providers offer consultations and will help you match the right equipment to your specific task, making your project less stressful and more efficient.
It’s also worth checking availability in advance, especially during peak seasons when landscaping and home improvement projects are in full swing. Many rental services allow online reservations, quotes, and even delivery options—making it easier than ever to secure your weekend equipment rental in Monroe, LA without spending your Friday afternoon hunting for tools.
Additionally, many rental providers in Monroe include tutorials or brief training when you pick up your equipment. This ensures you’ll not only know how to operate the tools safely but also how to use them effectively for professional-level results. Whether you’re new to DIY or a seasoned weekend warrior, these resources empower you to do more with confidence.
Rental insurance, service agreements, and flexible return policies also add peace of mind, especially when renting higher-value items. By taking the time to understand what’s available and how to use it, you turn your weekend from a “maybe” into a definite success.
Final Thoughts
In Monroe, LA, the world of equipment rental is vast, convenient, and cost-effective. Whether you’re reshaping your backyard, tackling a small construction job, preparing for a storm, or simply looking to check off some long-overdue tasks on your to-do list, renting the right tools and equipment can make all the difference. With the availability of landscaping equipment rental, tool rental, and generator rental in Monroe, there’s no reason to let lack of equipment hold you back.
So this weekend, instead of wondering how to make do with what you’ve got, consider renting exactly what you need. From lawn maintenance to heavy loaders, Monroe’s rental centers have everything you need to bring your vision to life—safely, affordably, and on your schedule. The only thing left is to roll up your sleeves and get started.
Need an Equipment Rental Company in Monroe, LA?
Welcome to Ram Rent-All, Inc. If you are looking for quality equipment, look no further. We are your one-stop solution for all of your equipment rental needs. We have a huge selection of equipment to choose from, from lawn and garden tools to construction necessities. Options include air compressors, Bobcats, forklifts, generators, tractors, water pumps, mixers, light towers, pressure washers, and more! If you’re going to do a job yourself, you want the best tools, and we can supply them to you at a reasonable price, without the need for costly contractors or direct purchases. Call us today!
Saving money on auto repairs doesn’t mean you have to sacrifice quality or safety. One of the smartest ways car owners and DIY mechanics can cut costs without compromising results is by renting heavy-duty automotive tools instead of buying them outright. These tools are often expensive, bulky, and only needed occasionally. From engine hoists to brake lathes, renting makes both financial and practical sense. Whether you’re a weekend warrior working on your classic car or simply trying to avoid expensive shop bills, understanding how to rent tools for car maintenance can significantly reduce your auto repair expenses.
Why Buying Isn’t Always the Best Investment
Purchasing heavy-duty tools can be a considerable investment. An engine hoist, for instance, can cost hundreds of dollars. If you’re only planning to use it once or twice, that purchase doesn’t make sense. Many vehicle-specific tools or diagnostics equipment also fall into this category. They’re critical for certain tasks but not used often enough to justify the cost or storage space.
Tool rental services exist for exactly this reason. They cater to both seasoned DIYers and first-timers looking for affordable auto repair tools. Not only does renting allow access to high-quality, professional-grade equipment, but it also saves you from the maintenance, storage, and depreciation that comes with ownership.
Also, let’s not forget how quickly technology evolves. Automotive tools, particularly diagnostic devices, are continually updated to keep pace with modern vehicle systems. Renting these tools ensures you always have the most current and capable equipment available, instead of using outdated gear that may not even be compatible with your vehicle.
Essential Tools Worth Renting
There are several heavy-duty tools that are almost always better rented than bought. One of the most common is an engine hoist. If you’ve ever searched for “engine hoist rental near me,” you know how many options are available. Engine hoists are essential for removing and reinstalling engines safely, and most DIYers don’t use them frequently enough to warrant a purchase. Renting one when needed is a budget-friendly and space-saving decision.
Another tool to consider renting is a transmission jack. Like engine hoists, these are bulky and usually only required when performing major drivetrain work. Renting one for a weekend project is a fraction of the cost of purchasing it new, and the rental often includes support or guidance on how to use it properly.
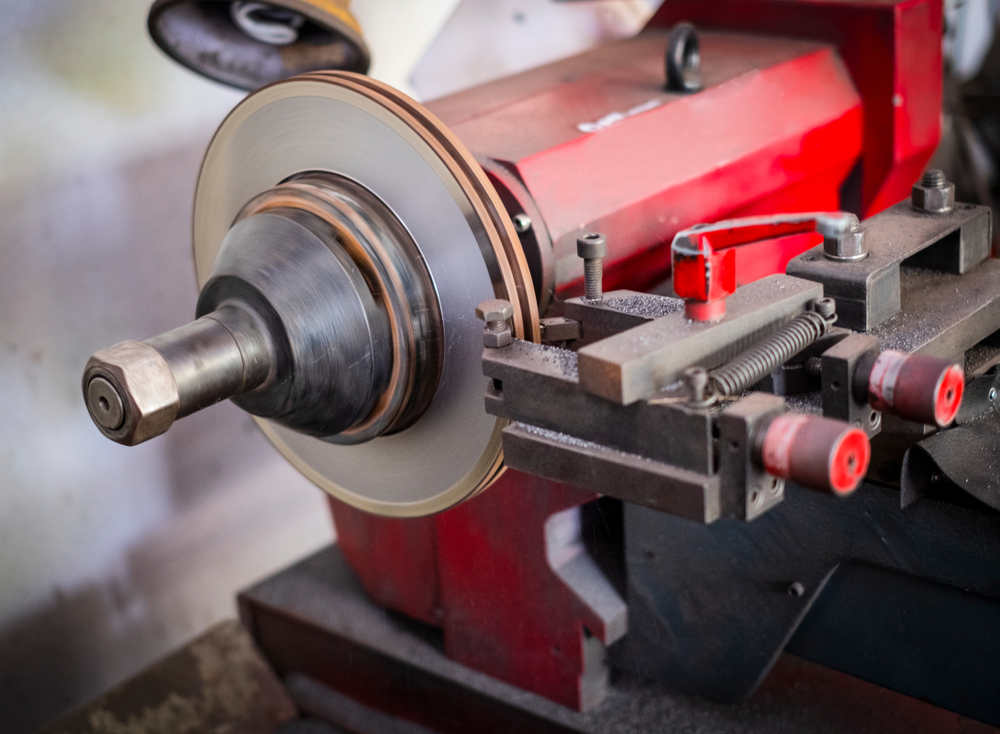
Brake lathes and spring compressors also fall into this category. A brake lathe, used for resurfacing brake rotors or drums, can cost thousands of dollars, while a spring compressor—though more affordable—is potentially dangerous if used incorrectly or if the unit is poorly maintained. Reputable rental centers ensure their tools are serviced and safe, giving you both peace of mind and economic advantage.
Renting also gives you access to specialized tools you may never need again, such as torque angle gauges, serpentine belt tools, or ball joint presses. These tools make the job easier, quicker, and often safer—and renting them means you don’t have to compromise just because you can’t justify buying them.
The Economics of Renting Auto Tools
Let’s break down the math. If you need a tool for one weekend job and the purchase price is $300, but a weekend rental is $30, you’ve saved 90%—and you don’t have to store it afterward. That’s a significant saving when you consider that most heavy-duty auto repair tools sit unused for 95% of the time after purchase.
Furthermore, many rental centers offer refundable deposits, meaning the upfront cost is manageable. Some even offer rent-to-own programs or waive rental fees if you purchase the tool afterward. This flexibility lets you test out equipment to see if it’s really worth owning in the long term.
Using a tool correctly the first time can also save you money on potential mistakes. Quality tools perform better, and by renting from a reputable supplier, you’re more likely to get something that’s been maintained and inspected, reducing the likelihood of failure mid-job. That’s a huge plus if you’re working on something mission-critical like an engine rebuild or transmission swap.
Don’t overlook the hidden costs of tool ownership either: storage, maintenance, cleaning, and even transportation can eat into the perceived value of buying. When you rent, those concerns are outsourced to the rental company. You return the tool when you’re done and get your space—and your money—back.
Where to Find Affordable Auto Repair Tools for Rent
Finding affordable auto repair tools is easier than ever thanks to widespread online directories and national chains offering tool rental services. Major auto parts retailers like AutoZone, O’Reilly Auto Parts, and Advance Auto Parts have robust tool loan programs. These programs typically require a deposit and offer free rentals for a few days, which is perfect for most DIY jobs.
For larger tools like engine hoists, transmission jacks, or brake lathes, equipment rental companies such as Home Depot, Sunbelt Rentals, or U-Haul often have what you need. Simply searching “engine hoist rental near me” can yield multiple local options, many with user reviews to help you select a reputable provider.
Independent rental centers and even some repair shops also rent out tools. In many cases, local shops offer better prices or more flexible rental terms than the big chains. Check with neighborhood mechanics or hardware stores to see if they have a rental program.
Additionally, peer-to-peer tool rental platforms are gaining popularity. These services allow individuals to rent out tools they own to other local DIYers. It’s an innovative solution that promotes sustainability and can often provide rare or vintage tools you won’t find at commercial outlets.
Tips for a Successful Tool Rental Experience
To make the most of your rental experience, it’s important to plan ahead. Make a checklist of all the tools you’ll need before starting your repair. This allows you to consolidate rental trips and often get discounts for bundling tools together.
Inspect the tool before accepting it. Make sure it’s clean, functional, and includes all necessary attachments or accessories. Reputable rental services will test tools in front of you, but it’s still wise to do your own check. If something seems off, don’t hesitate to ask for a replacement.
Understand the rental terms. Know exactly when you need to return the tool, what happens if you’re late, and whether any penalties apply. If your project takes longer than expected, communicate with the rental center—many will offer grace periods or extensions at reduced rates.
Lastly, educate yourself on how to use the tool properly. Many rental companies provide instructional videos or documentation. Even if you’re familiar with the tool, brushing up on safety practices can prevent accidents and ensure a smooth repair process.
Renting tools is not just about affordability; it’s about efficiency, safety, and getting the job done right the first time. With minimal investment and maximum benefit, it’s one of the most underutilized strategies to save money on auto repairs.
Conclusion
Whether you’re a hobbyist wrenching on weekends or someone looking to avoid the high cost of professional repairs, renting heavy-duty auto tools is a practical, budget-conscious approach. From searching for an “engine hoist rental near me” to borrowing that one specialty socket you didn’t know existed, taking advantage of tool rental programs helps you work smarter, not harder. When done right, it’s a win-win for your wallet, your workspace, and your vehicle.
Need an Equipment Rental Company in Monroe, LA?
Welcome to Ram Rent-All, Inc. If you are looking for quality equipment, look no further. We are your one-stop solution for all of your equipment rental needs. We have a huge selection of equipment to choose from, from lawn and garden tools to construction necessities. Options include air compressors, Bobcats, forklifts, generators, tractors, water pumps, mixers, light towers, pressure washers, and more! If you’re going to do a job yourself, you want the best tools, and we can supply them to you at a reasonable price, without the need for costly contractors or direct purchases. Call us today!
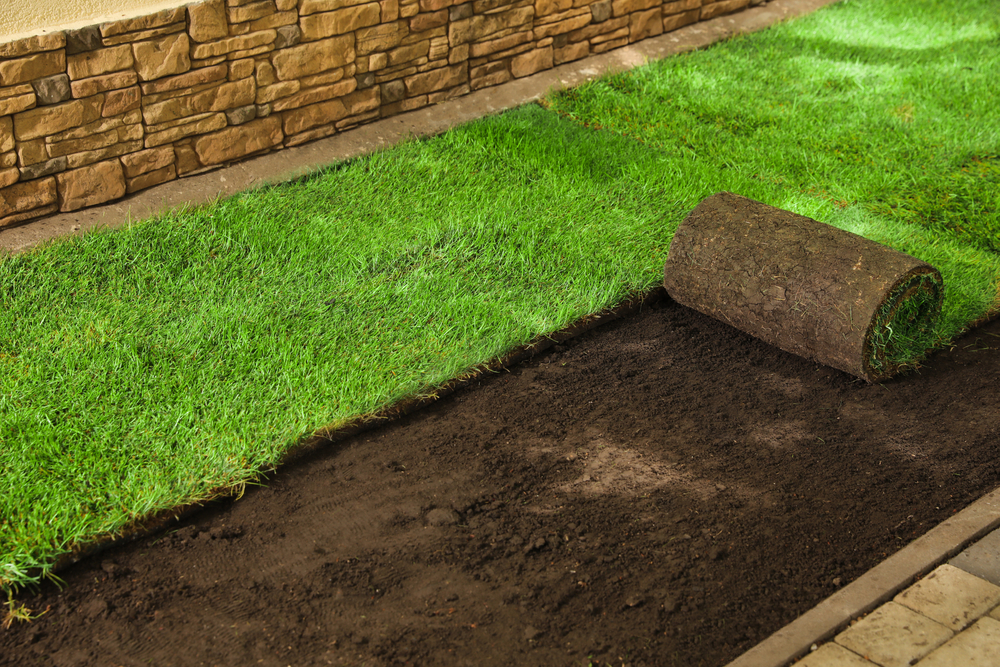
Installing sod is one of the most effective ways to transform a patchy, lifeless yard into a lush, green paradise almost overnight. But this transformation doesn’t begin with the sod itself—it starts with proper lawn preparation. If you’re wondering how to lay sod successfully, the most crucial step happens before the first roll of turf is ever unrolled. Prepping yard for sod installation takes time, effort, and the right tools. When done correctly, this preparation ensures your new lawn grows strong, remains healthy, and enhances your property’s curb appeal for years to come.
Let’s walk through everything you need to know about lawn preparation for sod, including how to prepare soil for sod, what tools you’ll need, and a step-by-step guide to make your sod installation a long-term success.
Why Proper Lawn Preparation Is Critical for Sod Installation
Before you start dreaming about walking barefoot on fresh grass, it’s essential to understand why prepping the yard for sod is such an important process. Unlike seeding, where grass slowly roots and matures over time, sod is a living carpet of mature grass with roots that must quickly adapt to your soil conditions. This means your soil must be optimized for water retention, nutrient absorption, and root penetration before installation begins.
Improper lawn preparation for sod can lead to a host of issues: poor root establishment, weed invasion, compacted soil, and even a complete failure of the sod to thrive. In contrast, taking the time to prepare your soil ensures even sod growth, robust root development, and a seamless transition from rolled turf to integrated lawn.
A good rule of thumb is that your lawn prep efforts should take at least as much time as the sod installation itself—if not more. From grading the land to removing debris, every step in the preparation phase is vital to your lawn’s long-term success.
Assessing and Preparing Your Soil: The Foundation for Sod Success
To begin prepping yard for sod, you need to start with a soil assessment. This often-overlooked step will give you insight into the current condition of your soil, including its pH level, nutrient balance, and composition (sand, silt, clay). A soil test kit or local extension office can help you determine what amendments may be necessary to create ideal growing conditions for sod.
After assessing the soil, it’s time to clear the area. Remove all weeds, existing grass, roots, rocks, and debris from the lawn. This process is essential because anything left behind can obstruct root growth or decompose under the sod, leading to uneven patches and dead spots.
Once the area is clear, it’s time to till the soil. Tilling breaks up compacted soil and improves aeration, allowing roots to penetrate more deeply. This step also helps mix in any organic matter or fertilizer that will boost soil health. As a rule, till the soil to a depth of about 4 to 6 inches for best results.
Next, address the grade and slope of your lawn. A slight slope (1–2%) away from buildings is ideal to encourage drainage and prevent water pooling near structures. Use a landscape rake or grading rake to achieve a smooth, even surface. Fill in low spots and level out high areas to avoid bumps and depressions that could affect the sod’s appearance and performance.
The Tools You’ll Need for Lawn Preparation and Sod Installation
Knowing how to lay sod effectively means having the right tools at your disposal. Whether you’re handling a small backyard or a sprawling landscape, the following tools will streamline your preparation and ensure better results.
First, you’ll need a sod cutter or shovel to remove the existing grass and weeds. A manual sod cutter can be used for small areas, while larger lawns may benefit from a gas-powered sod cutter for efficiency.
Next, a rototiller is essential for breaking up compacted soil. This allows you to mix in soil amendments such as compost, lime, or starter fertilizer. You can rent a rototiller from most hardware stores if you don’t own one.
A rake—preferably a landscape rake—is vital for leveling the soil and breaking up clumps after tilling. It helps to smooth the surface and spread added topsoil evenly.
For soil testing, use a pH soil test kit or send samples to a local extension lab. The results will guide what additives your soil may need, such as lime to raise pH or sulfur to lower it.
You’ll also need a lawn roller to lightly compress the soil before and after laying sod. This ensures proper root contact with the soil and prevents air pockets, which can dry out roots and cause patchy growth.
Finally, a garden hose with a sprinkler or irrigation system is necessary for watering the soil pre-installation and maintaining sod moisture during the critical establishment phase.
Having all these tools ready before you start will make the process smoother and more professional—and greatly increase the likelihood of sod survival.
Step-by-Step Instructions: How to Prepare Soil for Sod
Now that you have the tools and materials, it’s time to walk through the actual process of how to prepare soil for sod. This guide will help you go from bare dirt to sod-ready soil in a structured and efficient manner.
Start by removing the existing vegetation. Use a sod cutter to strip away old grass, roots, and weeds. This step creates a blank canvas for your new sod to thrive. After clearing, perform a soil test to check pH levels and identify any nutrient deficiencies. Based on the results, add compost, lime, fertilizer, or other amendments and mix them into the soil with a rototiller.
Till the soil thoroughly to a depth of at least 4 inches. This loosens the soil, improves drainage, and creates the best conditions for roots to take hold. Remove large rocks or clumps and ensure the soil is evenly broken up.
Rake the area smooth, adjusting the slope so that water drains away from structures. Fill low spots with topsoil, and ensure the surface is level and firm but not compacted. Use a lawn roller filled halfway with water to gently compress the soil, providing a stable base for the sod.
Water the soil lightly a day before laying sod. Moist, but not soggy, soil helps the sod roots establish quickly. Make sure to start installing sod as soon as it’s delivered to prevent it from drying out.
As you lay the sod, stagger the seams in a brickwork pattern and press edges tightly together to avoid gaps. Use a utility knife to trim corners and fit the sod around edges or curves. After installation, roll the sod again to ensure root-to-soil contact.
Finally, water the sod immediately after installation. Continue watering daily (or more often during hot weather) for the first two weeks to keep the sod moist while it establishes roots.
Post-Installation Tips for a Thriving Sod Lawn
Once your sod is installed, ongoing care becomes crucial to ensure its success. During the first two weeks, keep the sod consistently moist. This means watering daily, sometimes twice a day in hotter climates, to prevent drying out. Each watering session should thoroughly saturate the top few inches of soil to encourage deep root growth.
Avoid foot traffic on newly installed sod for the first 2–3 weeks. Walking on the sod too early can disturb the root development and create uneven patches.
After the first week, gently tug on the sod in various spots to check if the roots are beginning to anchor. If they resist slightly, you know the root system is starting to establish. At this point, you can begin tapering off the frequency of watering but increasing the amount per session to promote deeper root growth.
Mowing can begin when the grass reaches about 3–4 inches in height. Be sure the blades are sharp and only remove the top third of the grass to avoid stressing the new turf. Never mow when the grass is wet, as it can lead to tearing and fungal issues.
Fertilize about three to four weeks after installation with a balanced, slow-release lawn fertilizer. This gives the sod a boost of nutrients just as it’s finishing its initial rooting phase. Avoid using weed control products for at least three months, as these can harm the young grass.
In the weeks that follow, gradually transition to a regular lawn care schedule, including mowing, watering, and seasonal fertilization. Continue to monitor for signs of stress, such as discoloration or dry patches, and adjust your care routine accordingly.
Understanding how to lay sod is only part of the equation—maintaining your new lawn with diligence and care is what leads to a long-lasting, vibrant yard.
Conclusion
By focusing on proper lawn preparation for sod, selecting the right tools, and following a methodical approach to prepping yard for sod, you set the foundation for a healthy, resilient lawn that grows evenly and stays green all season long. Remember, the key to success lies not just in the sod itself, but in how you prepare the soil for sod to ensure optimal growth and performance.
Need an Equipment Rental Company in Monroe, LA?
Welcome to Ram Rent-All, Inc. If you are looking for quality equipment, look no further. We are your one-stop solution for all of your equipment rental needs. We have a huge selection of equipment to choose from, from lawn and garden tools to construction necessities. Options include air compressors, Bobcats, forklifts, generators, tractors, water pumps, mixers, light towers, pressure washers, and more! If you’re going to do a job yourself, you want the best tools, and we can supply them to you at a reasonable price, without the need for costly contractors or direct purchases. Call us today!
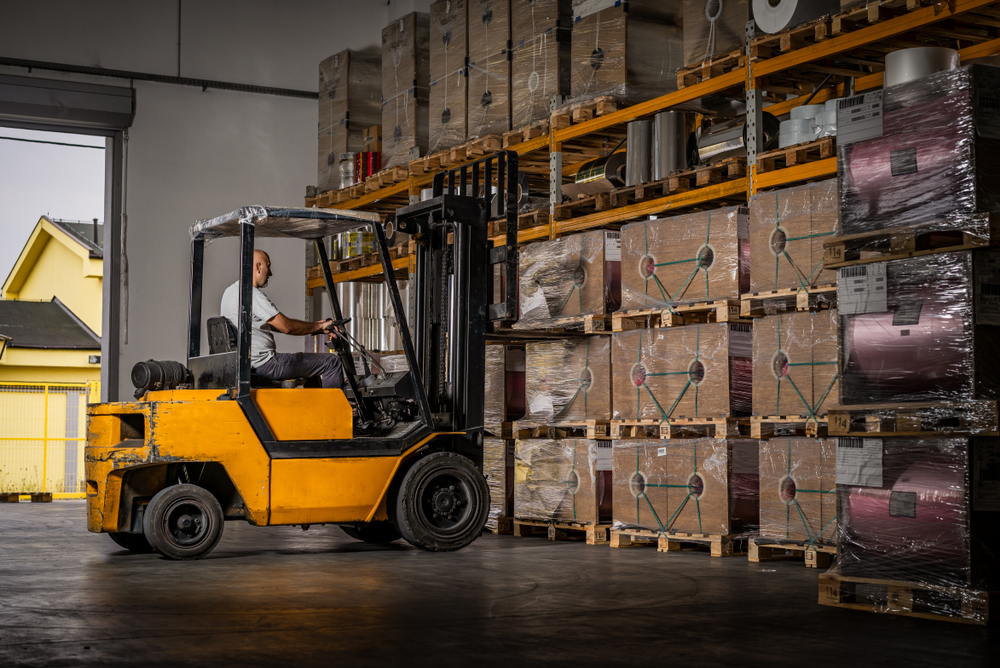
When it comes to managing warehouse operations or handling large goods in Monroe, LA, businesses are often faced with the decision of whether to rent a forklift or invest in buying one. While purchasing a forklift can seem like a long-term investment, renting one offers a range of advantages that can make more sense for many businesses, especially those that have fluctuating needs or want to keep costs down. In this blog, we’ll explore the top five reasons why renting a forklift in Monroe, LA, may be the smarter option for your business.
Flexibility and Cost-Effectiveness
One of the most compelling reasons to rent a forklift in Monroe, LA, is the flexibility it provides. Renting a forklift allows businesses to choose the type of equipment that best suits their specific needs at any given time. Whether you’re dealing with heavy-duty lifting or need a compact forklift for tighter spaces, forklift rentals can meet the exact requirements of your operation. Moreover, when you rent a forklift, you avoid the significant upfront costs associated with purchasing new equipment. This is especially beneficial for small businesses or those with seasonal demands, where long-term investments in machinery may not make financial sense. Forklift rental pricing is typically structured to be affordable on a short-term basis, which means you only pay for the equipment when you need it. This makes it easier to manage your cash flow and invest in other areas of your business without committing to a large purchase.
Reduced Maintenance and Repair Costs
Owning a forklift comes with a series of responsibilities, especially when it comes to maintenance and repairs. Forklifts require regular servicing to ensure they operate safely and efficiently, and any malfunction could lead to costly downtime. When you rent a forklift in Monroe, LA, the responsibility for maintenance is shifted to the rental company. Most forklift rentals come with maintenance and repair services included, meaning that if the forklift experiences any issues during the rental period, the rental company will handle the repairs without additional cost to you. This can save your business both time and money in the long run, as you don’t have to worry about the expenses associated with keeping the forklift in good working order. Additionally, forklifts from rental companies are generally well-maintained, meaning they’re less likely to experience breakdowns, giving you greater peace of mind.
Access to the Latest Equipment
Forklift technology is constantly evolving, with manufacturers frequently introducing new models that are more efficient, safer, and easier to operate. When you rent a forklift in Monroe, LA, you gain access to the latest equipment without the need to upgrade or replace old machinery. Rental companies typically update their fleets regularly to ensure that they are providing their customers with the most modern and technologically advanced forklifts available. This is particularly beneficial for businesses that rely on specialized equipment to meet unique lifting needs or have a high demand for efficiency in their operations. By renting a forklift, you can ensure that your business is using the best tools for the job without the financial burden of purchasing new equipment.
No Long-Term Commitment
Another advantage of renting a forklift in Monroe, LA, is that it eliminates the long-term commitment that comes with owning one. When you purchase a forklift, you’re making a significant financial commitment that can last for years. Forklifts are durable machines, but over time, their value depreciates, and businesses may find themselves with equipment that no longer meets their needs. Renting a forklift allows you to avoid this risk. If your lifting needs change or you no longer need the forklift after a certain period, you can simply return it to the rental company without the hassle of selling it or dealing with its depreciation. This flexibility is especially beneficial for businesses with fluctuating demands or those that operate in industries with unpredictable seasonal needs. Whether you need a forklift for a few weeks, months, or just a few days, forklift rentals allow you to scale your equipment needs up or down without the commitment of owning.
Tax Benefits and Deductible Expenses
In addition to the operational benefits, renting a forklift in Monroe, LA, can also offer potential tax advantages. Rental expenses are generally considered a business operating expense, which means they can be deducted as part of your business’s operating costs. This can lower your taxable income and help reduce your overall tax burden. On the other hand, purchasing a forklift requires businesses to account for depreciation, and while there may be some tax benefits to owning equipment, it often takes years before these advantages are realized. Renting, on the other hand, provides immediate financial relief and can help your business stay in good standing with cash flow management. For businesses that need to keep their operating costs predictable, renting a forklift allows you to have more control over your budget and avoid the complexities of tax depreciation schedules associated with owning equipment.
Conclusion
Deciding whether to rent or buy a forklift in Monroe, LA, ultimately depends on the unique needs of your business. However, renting a forklift offers numerous advantages that can make it a smarter choice for many companies. From the flexibility of only paying for what you need to the peace of mind of not worrying about maintenance and repairs, forklift rentals provide a cost-effective and hassle-free solution for businesses of all sizes. By avoiding the upfront costs and long-term commitments associated with purchasing equipment, you can ensure that your business has access to the right tools without tying up significant resources. Whether you’re managing seasonal workloads, require specialized equipment, or simply want to avoid the responsibilities of ownership, renting a forklift in Monroe, LA, can offer significant benefits over buying.
Need an Equipment Rental Company in Monroe, LA?
Welcome to Ram Rent-All, Inc. If you are looking for quality equipment, look no further. We are your one-stop solution for all of your equipment rental needs. We have a huge selection of equipment to choose from, from lawn and garden tools to construction necessities. Options include air compressors, Bobcats, forklifts, generators, tractors, water pumps, mixers, light towers, pressure washers, and more! If you’re going to do a job yourself, you want the best tools, and we can supply them to you at a reasonable price, without the need for costly contractors or direct purchases. Call us today!