
How to Prep Your Lawn for Sod Installation — Tools You’ll Need
Installing sod is one of the most effective ways to transform a patchy, lifeless yard into a lush, green paradise almost overnight. But this transformation doesn’t begin with the sod itself—it starts with proper lawn preparation. If you’re wondering how to lay sod successfully, the most crucial step happens before the first roll of turf is ever unrolled. Prepping yard for sod installation takes time, effort, and the right tools. When done correctly, this preparation ensures your new lawn grows strong, remains healthy, and enhances your property’s curb appeal for years to come.
Let’s walk through everything you need to know about lawn preparation for sod, including how to prepare soil for sod, what tools you’ll need, and a step-by-step guide to make your sod installation a long-term success.
Why Proper Lawn Preparation Is Critical for Sod Installation
Before you start dreaming about walking barefoot on fresh grass, it’s essential to understand why prepping the yard for sod is such an important process. Unlike seeding, where grass slowly roots and matures over time, sod is a living carpet of mature grass with roots that must quickly adapt to your soil conditions. This means your soil must be optimized for water retention, nutrient absorption, and root penetration before installation begins.
Improper lawn preparation for sod can lead to a host of issues: poor root establishment, weed invasion, compacted soil, and even a complete failure of the sod to thrive. In contrast, taking the time to prepare your soil ensures even sod growth, robust root development, and a seamless transition from rolled turf to integrated lawn.
A good rule of thumb is that your lawn prep efforts should take at least as much time as the sod installation itself—if not more. From grading the land to removing debris, every step in the preparation phase is vital to your lawn’s long-term success.
Assessing and Preparing Your Soil: The Foundation for Sod Success
To begin prepping yard for sod, you need to start with a soil assessment. This often-overlooked step will give you insight into the current condition of your soil, including its pH level, nutrient balance, and composition (sand, silt, clay). A soil test kit or local extension office can help you determine what amendments may be necessary to create ideal growing conditions for sod.
After assessing the soil, it’s time to clear the area. Remove all weeds, existing grass, roots, rocks, and debris from the lawn. This process is essential because anything left behind can obstruct root growth or decompose under the sod, leading to uneven patches and dead spots.
Once the area is clear, it’s time to till the soil. Tilling breaks up compacted soil and improves aeration, allowing roots to penetrate more deeply. This step also helps mix in any organic matter or fertilizer that will boost soil health. As a rule, till the soil to a depth of about 4 to 6 inches for best results.
Next, address the grade and slope of your lawn. A slight slope (1–2%) away from buildings is ideal to encourage drainage and prevent water pooling near structures. Use a landscape rake or grading rake to achieve a smooth, even surface. Fill in low spots and level out high areas to avoid bumps and depressions that could affect the sod’s appearance and performance.
The Tools You’ll Need for Lawn Preparation and Sod Installation
Knowing how to lay sod effectively means having the right tools at your disposal. Whether you’re handling a small backyard or a sprawling landscape, the following tools will streamline your preparation and ensure better results.
First, you’ll need a sod cutter or shovel to remove the existing grass and weeds. A manual sod cutter can be used for small areas, while larger lawns may benefit from a gas-powered sod cutter for efficiency.
Next, a rototiller is essential for breaking up compacted soil. This allows you to mix in soil amendments such as compost, lime, or starter fertilizer. You can rent a rototiller from most hardware stores if you don’t own one.
A rake—preferably a landscape rake—is vital for leveling the soil and breaking up clumps after tilling. It helps to smooth the surface and spread added topsoil evenly.
For soil testing, use a pH soil test kit or send samples to a local extension lab. The results will guide what additives your soil may need, such as lime to raise pH or sulfur to lower it.
You’ll also need a lawn roller to lightly compress the soil before and after laying sod. This ensures proper root contact with the soil and prevents air pockets, which can dry out roots and cause patchy growth.
Finally, a garden hose with a sprinkler or irrigation system is necessary for watering the soil pre-installation and maintaining sod moisture during the critical establishment phase.
Having all these tools ready before you start will make the process smoother and more professional—and greatly increase the likelihood of sod survival.
Step-by-Step Instructions: How to Prepare Soil for Sod
Now that you have the tools and materials, it’s time to walk through the actual process of how to prepare soil for sod. This guide will help you go from bare dirt to sod-ready soil in a structured and efficient manner.
Start by removing the existing vegetation. Use a sod cutter to strip away old grass, roots, and weeds. This step creates a blank canvas for your new sod to thrive. After clearing, perform a soil test to check pH levels and identify any nutrient deficiencies. Based on the results, add compost, lime, fertilizer, or other amendments and mix them into the soil with a rototiller.
Till the soil thoroughly to a depth of at least 4 inches. This loosens the soil, improves drainage, and creates the best conditions for roots to take hold. Remove large rocks or clumps and ensure the soil is evenly broken up.
Rake the area smooth, adjusting the slope so that water drains away from structures. Fill low spots with topsoil, and ensure the surface is level and firm but not compacted. Use a lawn roller filled halfway with water to gently compress the soil, providing a stable base for the sod.
Water the soil lightly a day before laying sod. Moist, but not soggy, soil helps the sod roots establish quickly. Make sure to start installing sod as soon as it’s delivered to prevent it from drying out.
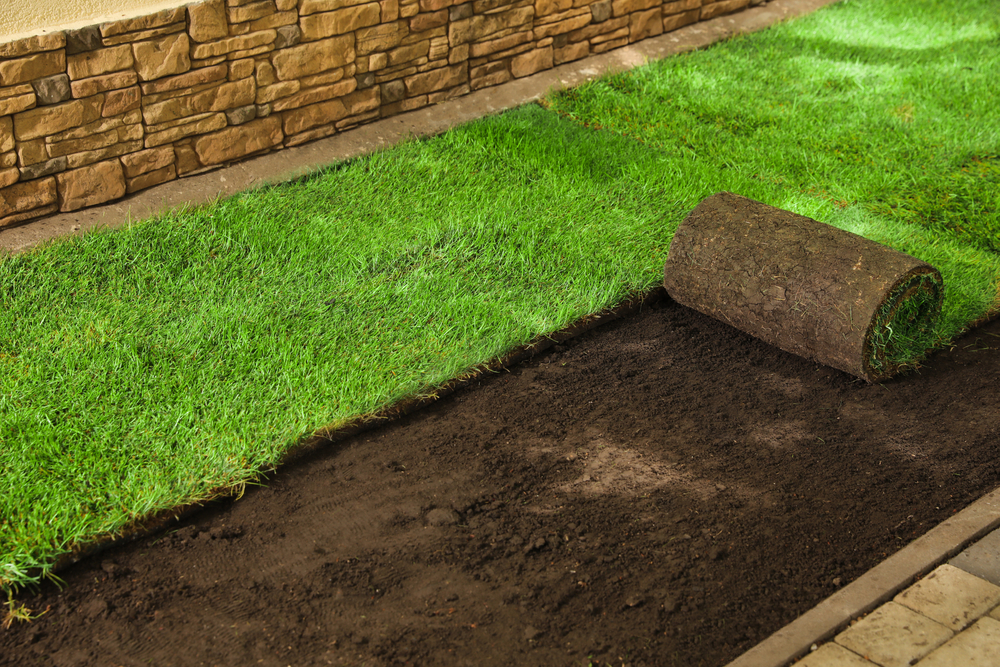
As you lay the sod, stagger the seams in a brickwork pattern and press edges tightly together to avoid gaps. Use a utility knife to trim corners and fit the sod around edges or curves. After installation, roll the sod again to ensure root-to-soil contact.
Finally, water the sod immediately after installation. Continue watering daily (or more often during hot weather) for the first two weeks to keep the sod moist while it establishes roots.
Post-Installation Tips for a Thriving Sod Lawn
Once your sod is installed, ongoing care becomes crucial to ensure its success. During the first two weeks, keep the sod consistently moist. This means watering daily, sometimes twice a day in hotter climates, to prevent drying out. Each watering session should thoroughly saturate the top few inches of soil to encourage deep root growth.
Avoid foot traffic on newly installed sod for the first 2–3 weeks. Walking on the sod too early can disturb the root development and create uneven patches.
After the first week, gently tug on the sod in various spots to check if the roots are beginning to anchor. If they resist slightly, you know the root system is starting to establish. At this point, you can begin tapering off the frequency of watering but increasing the amount per session to promote deeper root growth.
Mowing can begin when the grass reaches about 3–4 inches in height. Be sure the blades are sharp and only remove the top third of the grass to avoid stressing the new turf. Never mow when the grass is wet, as it can lead to tearing and fungal issues.
Fertilize about three to four weeks after installation with a balanced, slow-release lawn fertilizer. This gives the sod a boost of nutrients just as it’s finishing its initial rooting phase. Avoid using weed control products for at least three months, as these can harm the young grass.
In the weeks that follow, gradually transition to a regular lawn care schedule, including mowing, watering, and seasonal fertilization. Continue to monitor for signs of stress, such as discoloration or dry patches, and adjust your care routine accordingly.
Understanding how to lay sod is only part of the equation—maintaining your new lawn with diligence and care is what leads to a long-lasting, vibrant yard.
Conclusion
By focusing on proper lawn preparation for sod, selecting the right tools, and following a methodical approach to prepping yard for sod, you set the foundation for a healthy, resilient lawn that grows evenly and stays green all season long. Remember, the key to success lies not just in the sod itself, but in how you prepare the soil for sod to ensure optimal growth and performance.
Need an Equipment Rental Company in Monroe, LA?
Welcome to Ram Rent-All, Inc. If you are looking for quality equipment, look no further. We are your one-stop solution for all of your equipment rental needs. We have a huge selection of equipment to choose from, from lawn and garden tools to construction necessities. Options include air compressors, Bobcats, forklifts, generators, tractors, water pumps, mixers, light towers, pressure washers, and more! If you’re going to do a job yourself, you want the best tools, and we can supply them to you at a reasonable price, without the need for costly contractors or direct purchases. Call us today!